Weaving
Learn to weave on the Rigid Heddle Loom
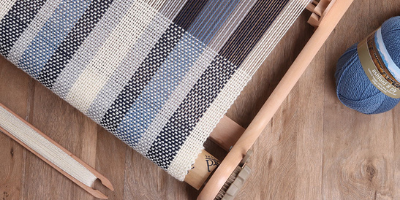
Learn to weave with this easy to follow tutorial. Welcome to the wonderful world of weaving. In this tutorial you will learn to weave on a Rigid Heddle Loom and in the process, create a gorgeous scarf for yourself.
YOUR FIRST PROJECT – MAKE YOUR OWN SCARF
You will need:
- A pair of sharp scissors
- A measuring tape
- Cardboard warp sticks
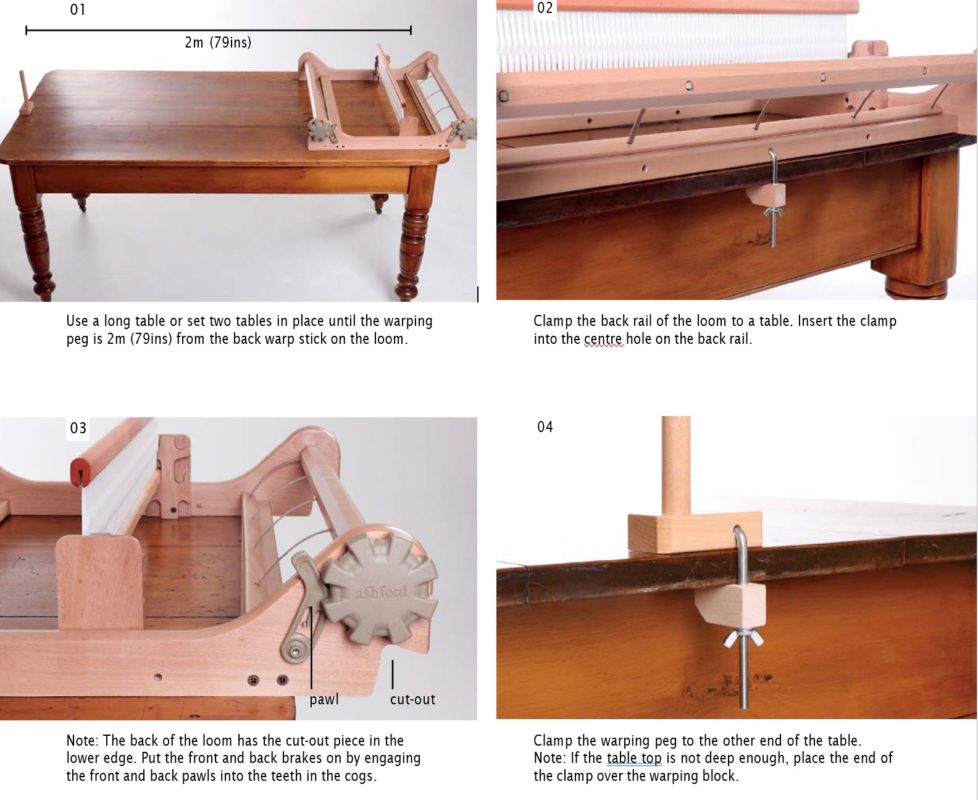
- One long table or two smaller table
Understanding Weaving Terms
Yarn
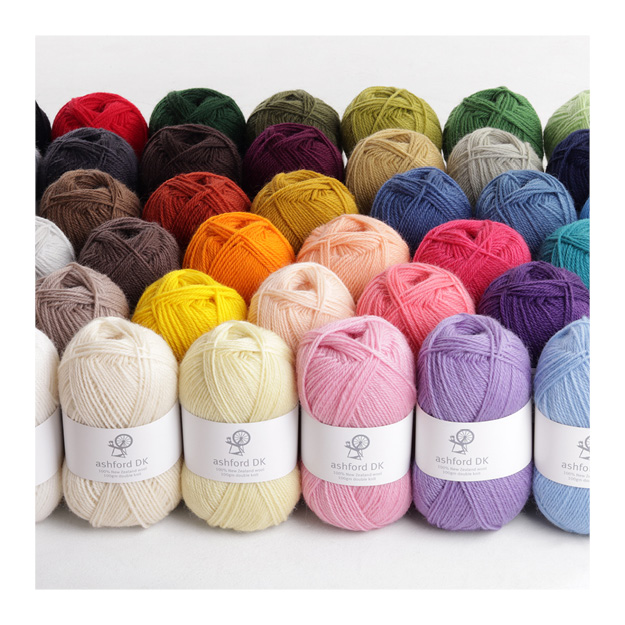
For this project we have used Ashford Tekapo, a smooth DK (double knit) sport weight yarn with a slightly textured handspun look, for the warp and the weft. However you can try the newer Ashford Dk Yarn, which you can find here
Ashford Tekapo 8ply/DK yarn (100% wool, 200m/218yds, 100gm net) #206 Natural White, #230 Midnight Blue, #229 Stonewash, #228 Silver.
Warp
Use Ashford Tekapo in stripes of blue, silver and white.
Length – 2m (79ins) allowing 23cm (9ins) at each end for fringe Number of ends – 84
Finished width – 28cm (11ins)
Weft
Ashford Tekapo #206 Natural White.
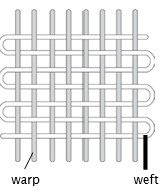
WARP AND WEFT
These are two terms you will need to know as they form the basis of all weaving. The warp threads are put onto the loom first. They are held on the loom under tension between the front and back roller. The weft threads pass over and under the warp threads to form the woven fabric.
SHED
The shed is the opening formed in the warp, through which the shuttle passes.
OPTIONAL ACCESSORIES
Extra reeds 10, 20, 30, 40, 50 and 60 dents per 10cm (2.5, 5, 7.5, 10, 12.5 and 15 dents per inch), vari dent reed, freedom roller, table stand, loom stand, warping pegs for indirect warping option, pickup sticks, shuttles, weaving needles, tapestry beater, warp thread weights, fringe twister

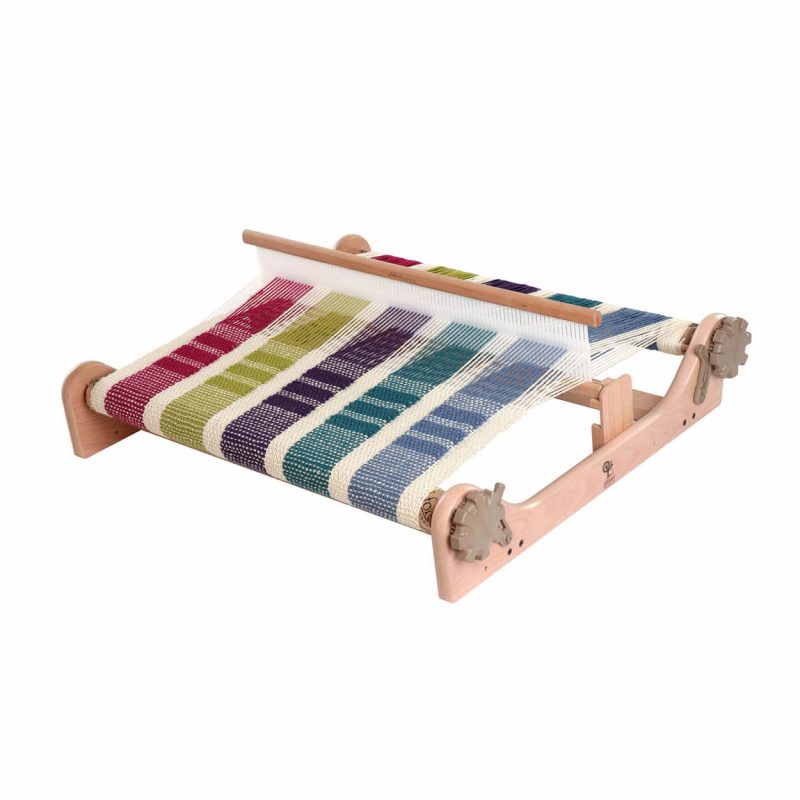
LEARN TO WEAVE ON THE RIGID HEDDLE LOOM
THE WEAVING LOOM
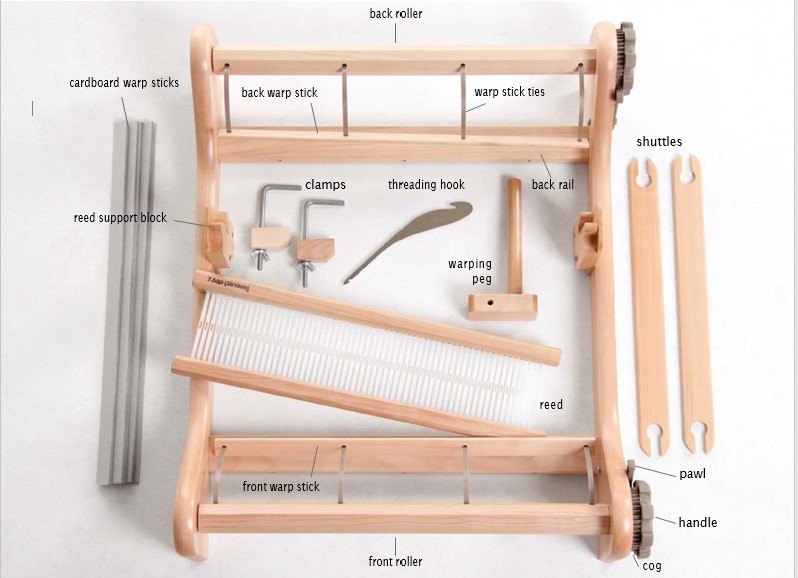
What is the weaving reed?
The reed has eyes and slots that the warp threads pass through to create the weaving shed. The reed is also used as a beater to push the rows of weaving into place. This reed spaces the threads at 30 threads to each 10cm section of reed or 7.5 threads to 1inch.
The reed can also be called a heddle. The shuttle is used to carry the weft yarn from side to side through the shed to make the fabric.
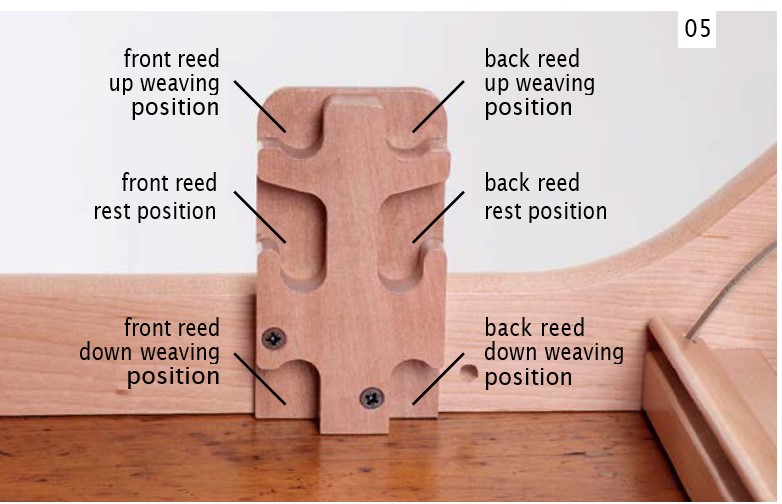
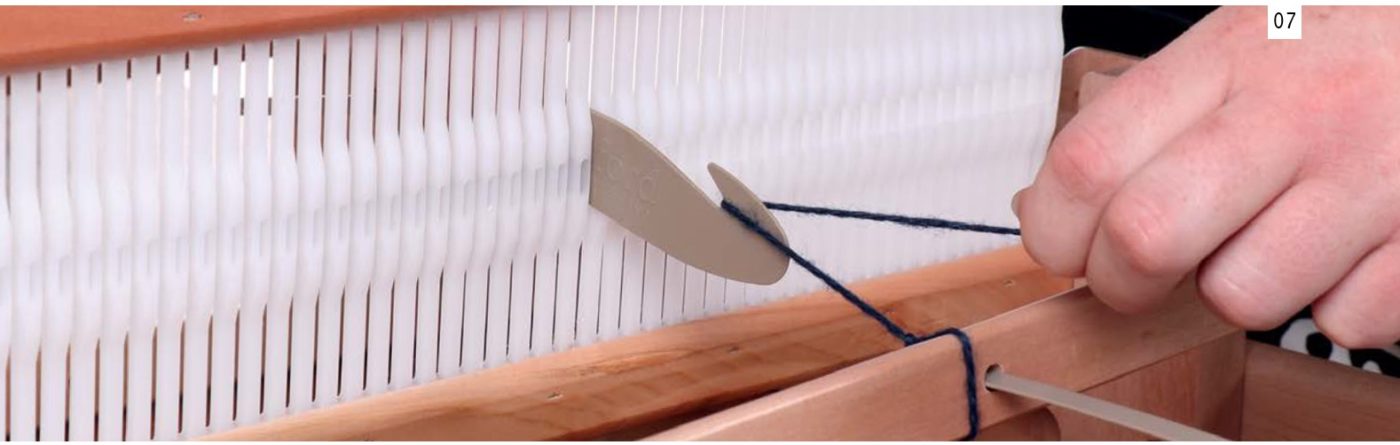
The warping tools, a warping peg, a threading hook and 2 clamps, are used to warp the loom.
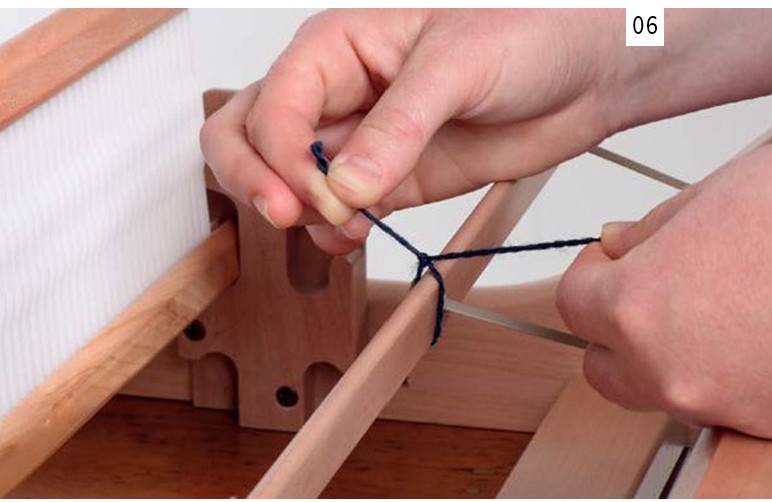
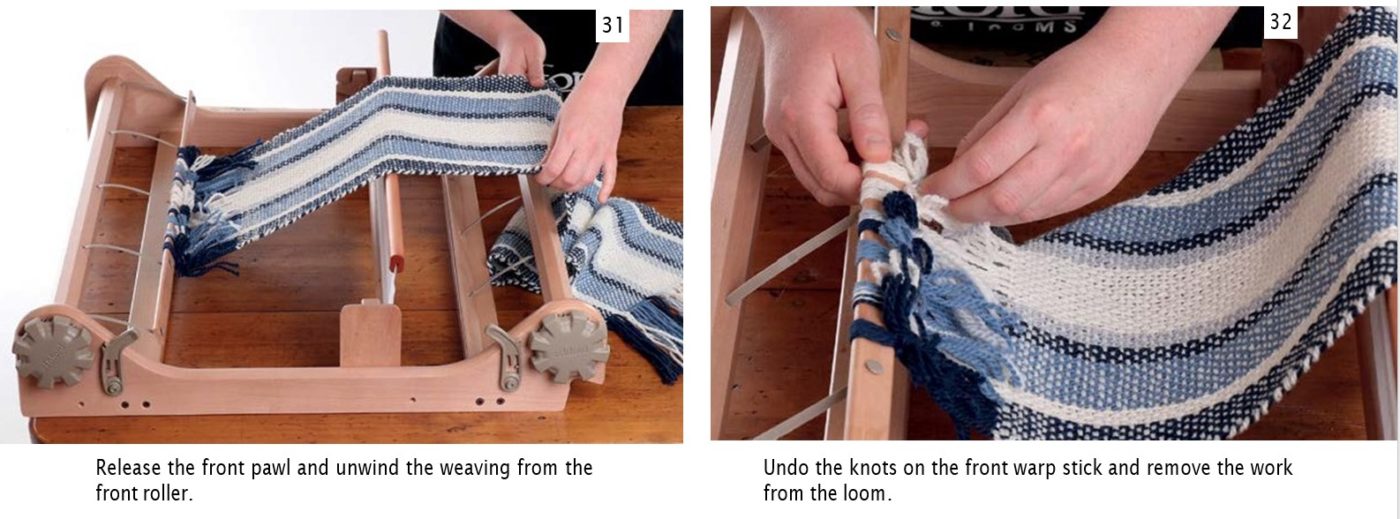
Use the front set of weaving positions when using one reed. When using two reeds for weaving double width, double layer and patterns use the front and the back set of weaving positions.* Note: The three positions on the reed support block are up, down and rest
There are 84 warp ends in this scarf. That is 42 double threads that first go through the slots in the reed. See the guide below to locate your first slot. Tie the warp yarn to the back warp stick behind the first slot.
Guide:
- 40cm (16ins) loom – Start 9 slots from one the end.
- 60cm (24ins) loom – Start 24 slots from one the end.
- 80cm (32ins) loom – Start 39 slots from one the end.
Start using your threading hook
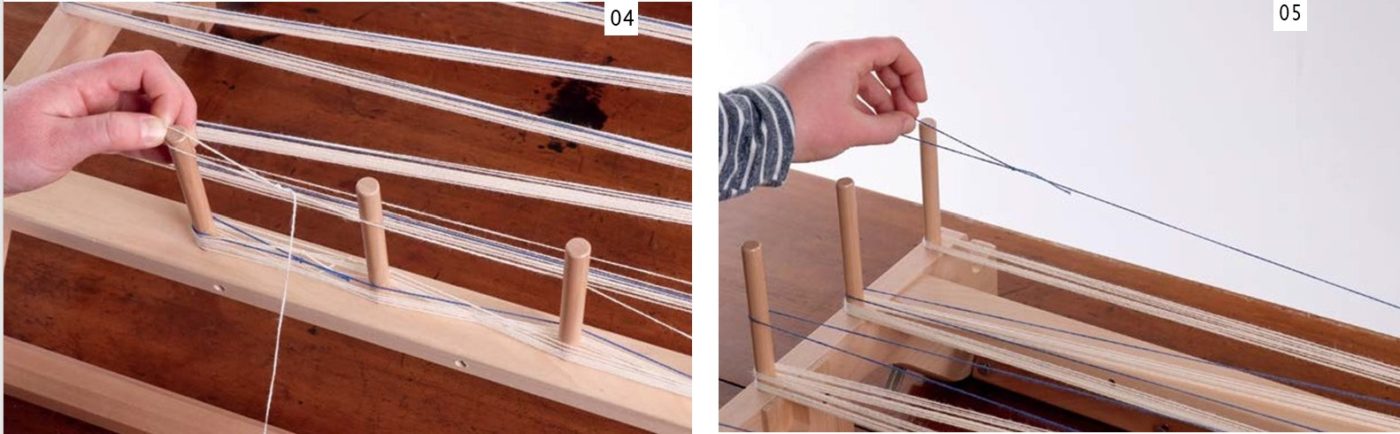
Put the threading hook through the first slot. Catch the yarn with the hook and pull a loop through the slot.
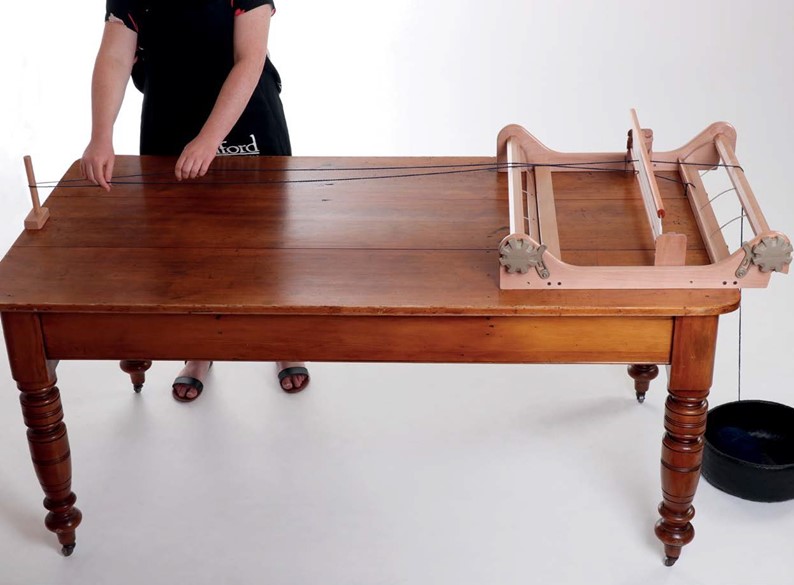
Take the yarn to the warping peg and loop it over. Sit the ball of yarn on the floor behind the loom.
Hint: Sit the ball of yarn in a bowl so it doesn’t roll around on the floor.
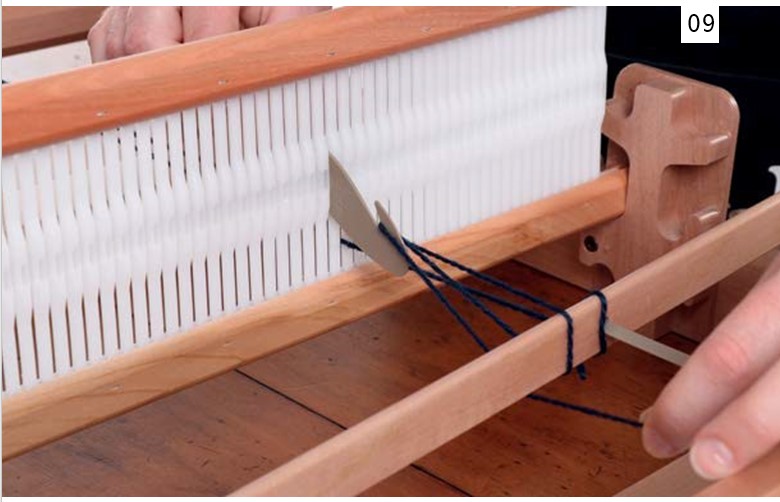
Put the threading hook through the next slot. Take the yarn UNDER the back warp stick, catch the yarn on the hook and pull a loop through the slot. Place this loop over the warping peg in the same way as the first loop. Try and keep the tension even along the length of the warp
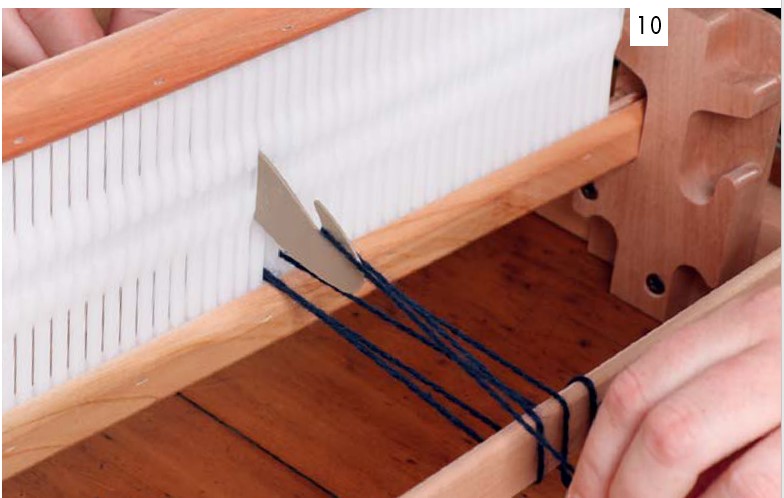
Go to the next slot. Take the yarn OVER the back stick, through the slot and over the warping peg. Continue this way, one yarn thread under, one thread over the back warp stick until you have 42 double threads through the slots (84 ends)
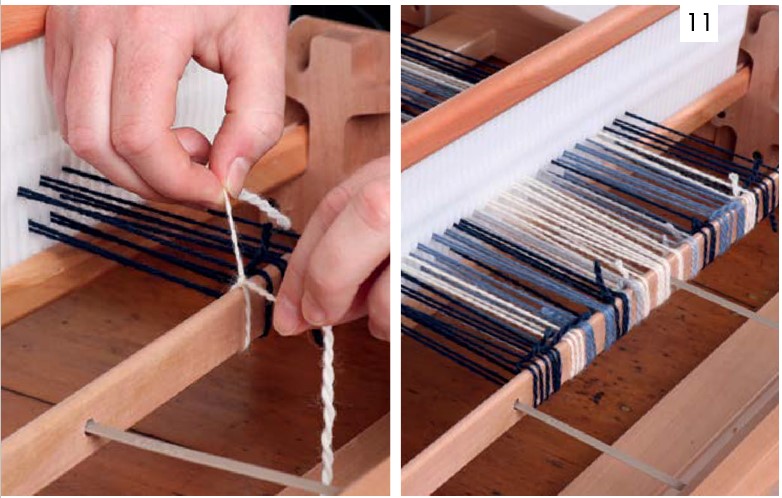
To change weaving thread colours:
Cut and tie off one colour to the back warp stick. Tie on the new colour to the back warp stick. Pull the new thread through the next slot and loop over the warping peg. Continue with steps 09 and 10 until the next yarn colour. Finish by tying the last thread to the back warp stick
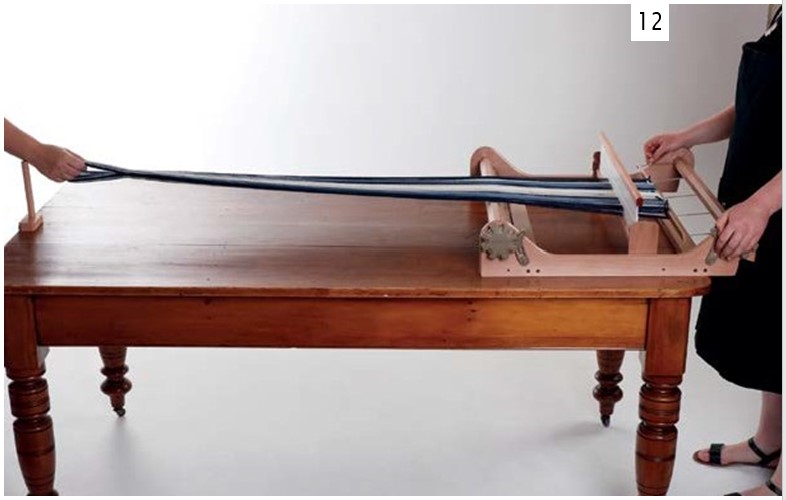
Ask a friend to hold the warp ends for you and move forward as you wind the warp onto the loom.
Stand at the back of the loom. Wind the back handle towards you until the back warp stick goes around the roller once
Insert a cardboard warp stick or piece of paper the full width of the back roller
Have you got all your weaving supplies closeby?
The cardboard warp sticks or paper separate the yarns and keeps the tension even. Add more cardboard warp sticks or paper as you wind on the warp.
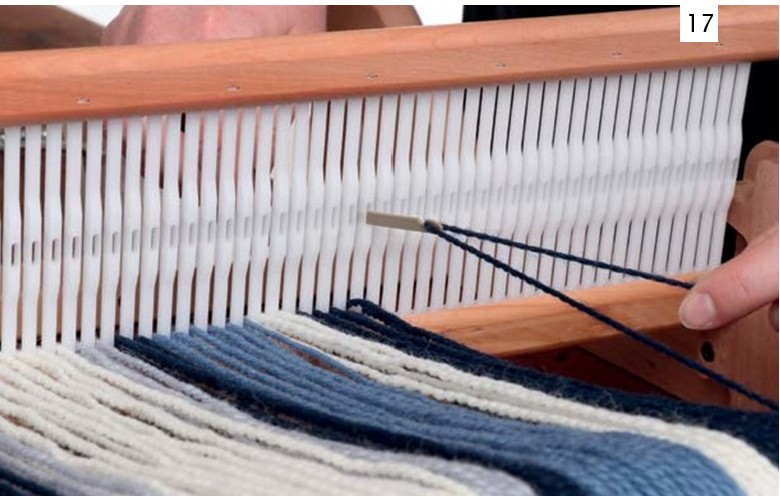
Stop when the end of the warp reaches the front roller. Cut through all the yarn loops. Do not wind any further. Unclamp the loom for threading
Take one thread from the first slot. Using the threading hook, pull this thread through the eye to the right of the slot. The other thread stays in the slot. (Picture from back of the reed
Continue across all slots. Now threads are in both eyes and slots. (Picture from front of the reed)
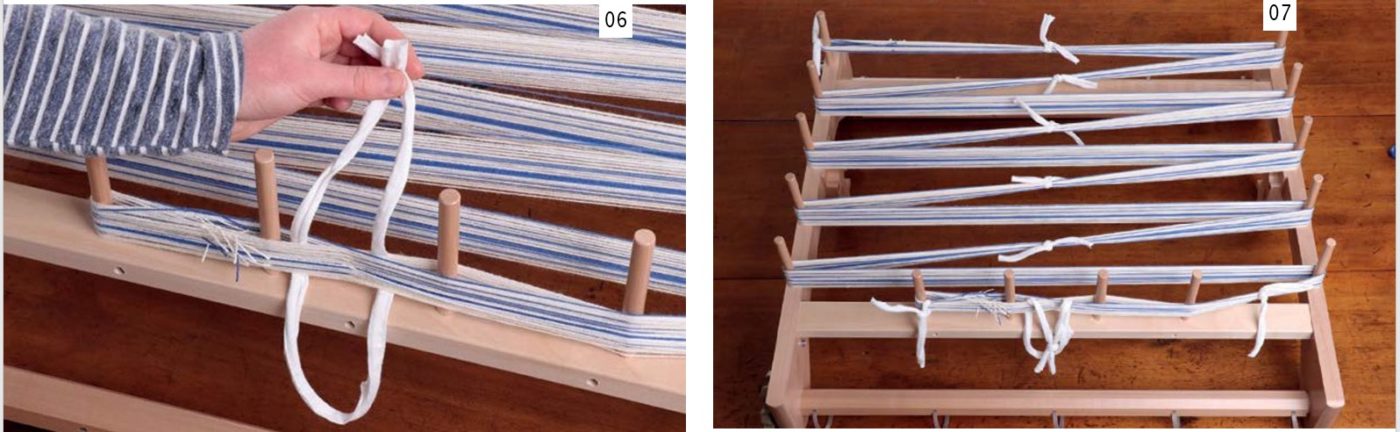
Divide your weaving threads
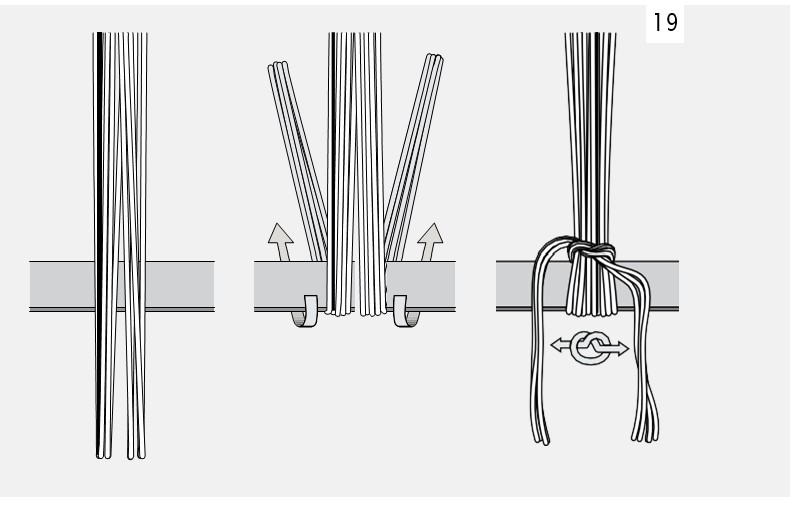
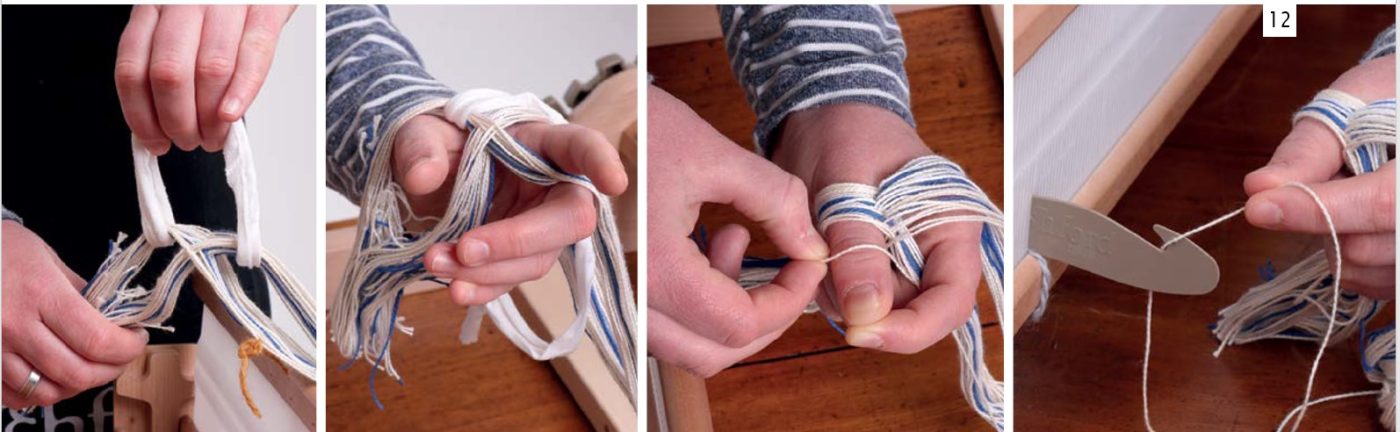
Divide the threads into small groups. Take a group of threads over and around the front warp stick. Divide it in two. Tie around the top of the group in a flat SINGLE knot. Tie the width of the warp in the same way
Check the tension. Adjust the knots until all groups are the same tension. Note: To adjust a knot simply hold the threads on both sides of the knot and gently pull upwards towards the reed, then retighten.
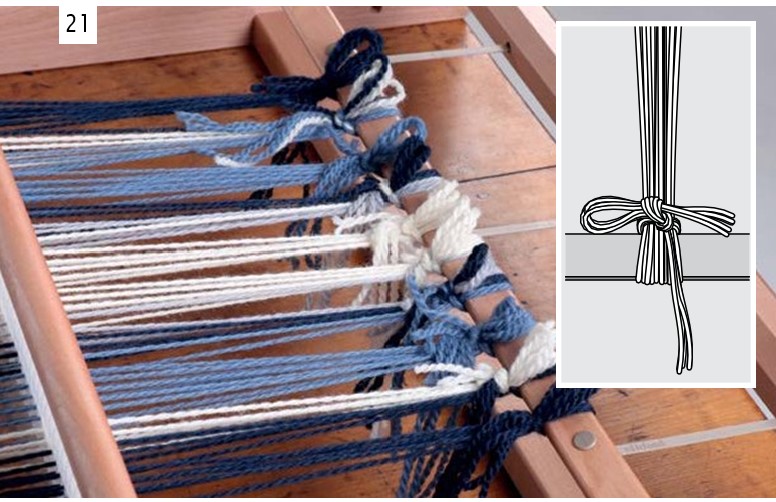
Tie the second half of the knots using a half bow tie to secure. You want to be able to undo these knots easily when your weaving is finished.
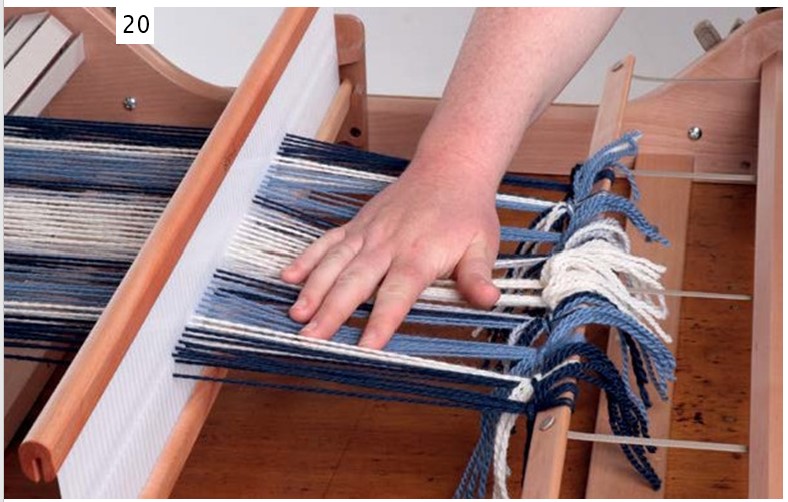
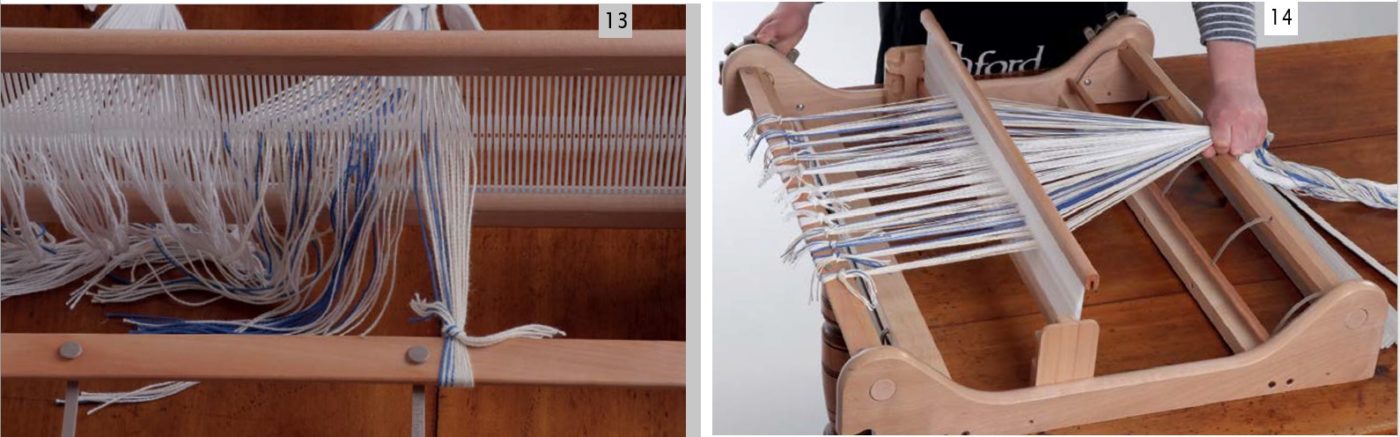
SPREADING THE WARP
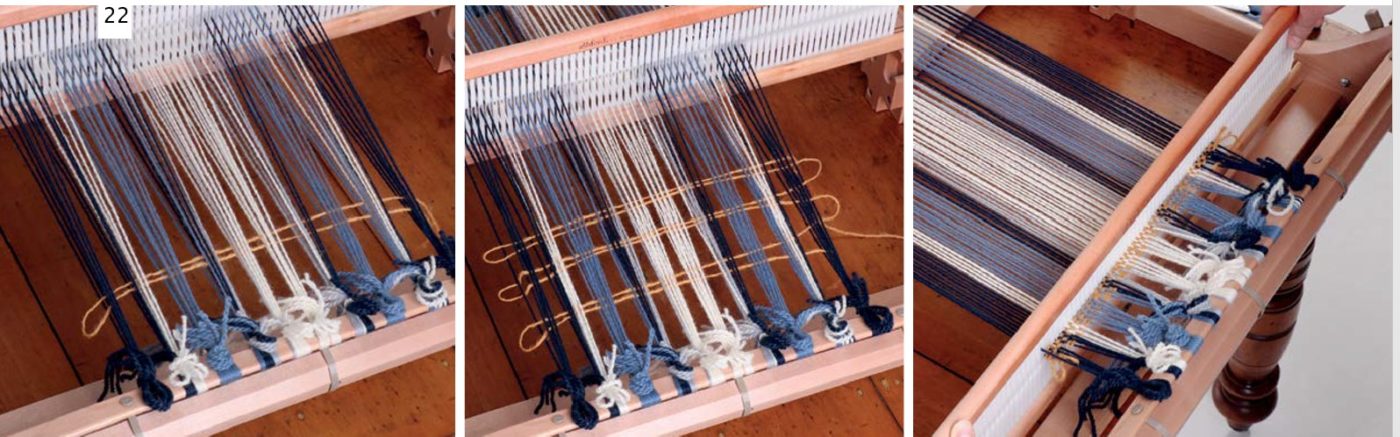
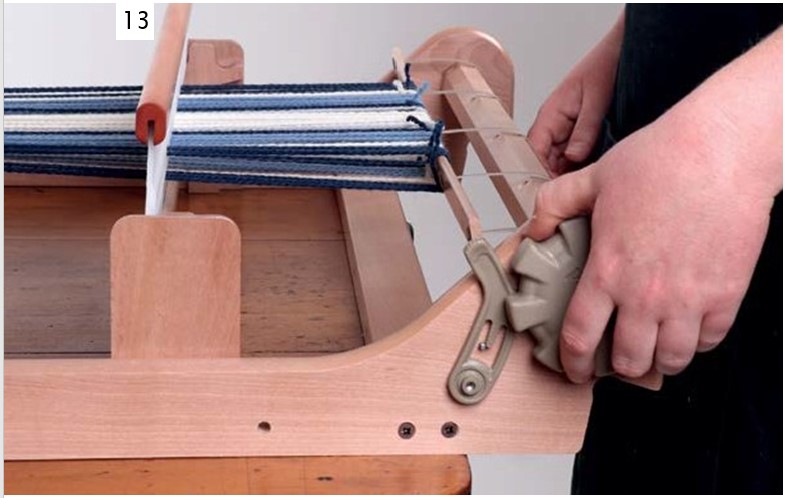
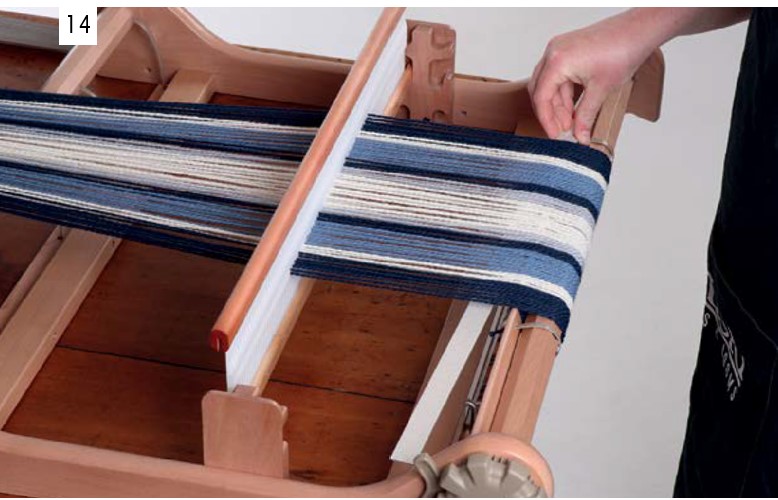
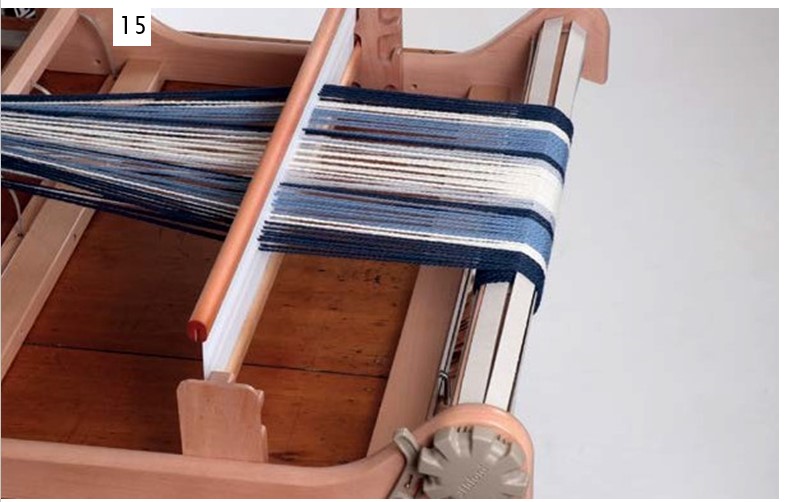
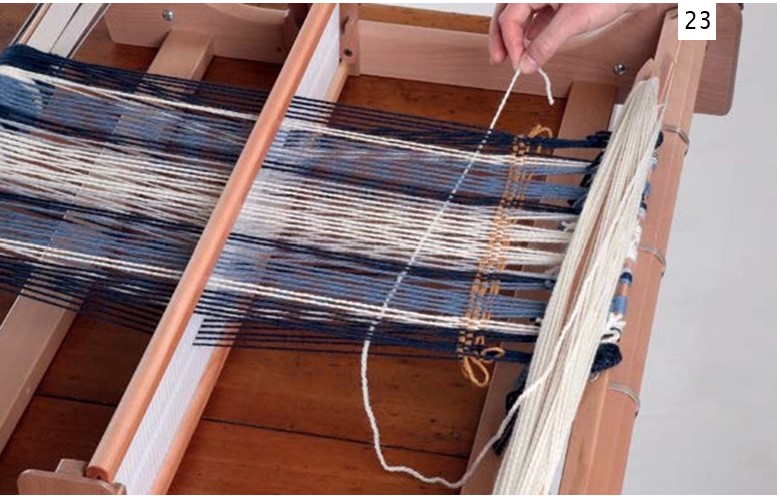
Before weaving, you need to close the spaces the knots have created, this is called spreading the warp. Advance the warp to the front roller, release the tension on the warp by turning the back handle away slightly and pull the pawl out of the cog. Keeping tension on the back handle, wind the front handle towards you until the front warp stick reaches the front roller. Click the back pawl down and retension the warp. Place the reed in the up weaving position. Insert a loop of scrap yarn, from the right side of the warp, into the shed.
DO NOT beat, change the reed to the down weaving position. Insert a second loop into the shed (ensure the end of the scrap yarn remains on the right side of the warp to allow easy removal). Repeat again in the up position. Now use the reed to gently push the scrap yarn towards the knots, until the scrap yarn is compressed. The warp threads will now be evenly spread.
Learning to weave is easier than you think, so lets keep going
Now you are ready to weave. Wind the weft yarn onto the shuttle. Put the reed into the down weaving position. Pass the shuttle through the shed. Use the reed to gently push the first row of weaving down to the scrap yarn
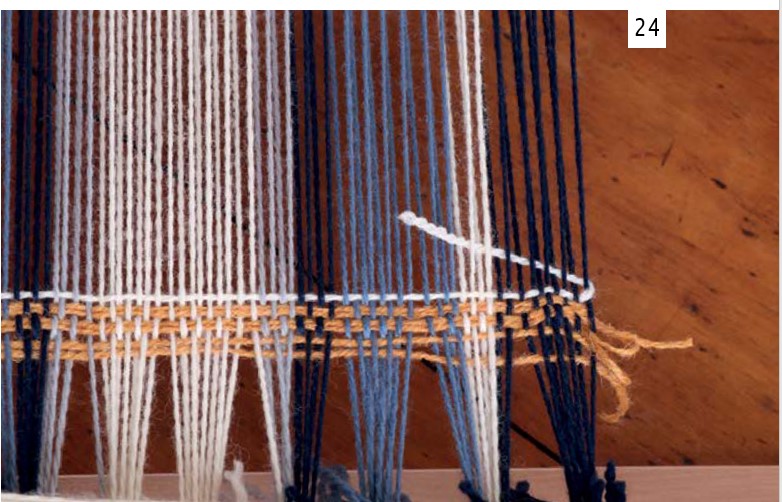
Put the reed into the up weaving position. Use your fingers to place the end thread into the shed. Pass the shuttle through the up shed. Use the reed to gently push the second row into place
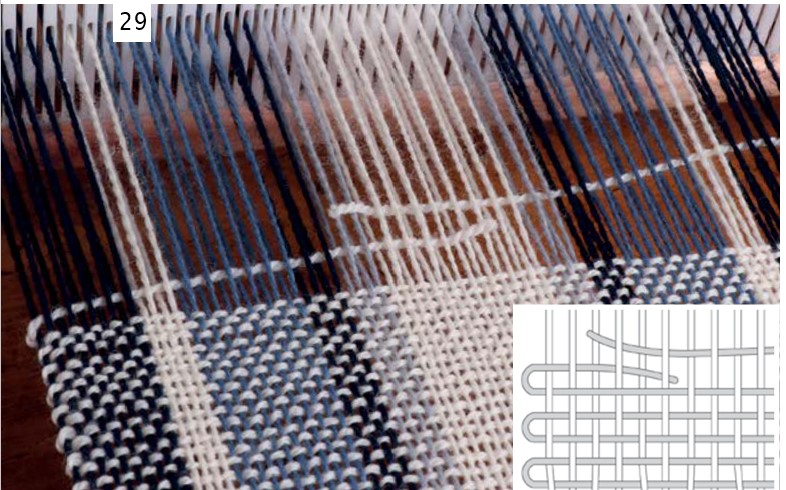
Hint: To avoid drawing in the sides of your weaving, allow enough weft yarn on each row by passing the shuttle through the shed, pinch the weft thread in line with the outside warp thread and lay the weft in the shed at a 30 degree angle. Gently push the weft into place with the reed.
NOTE: BEAT GENTLY! THERE MUST BE A SMALL SPACE BETWEEN THE ROWS.
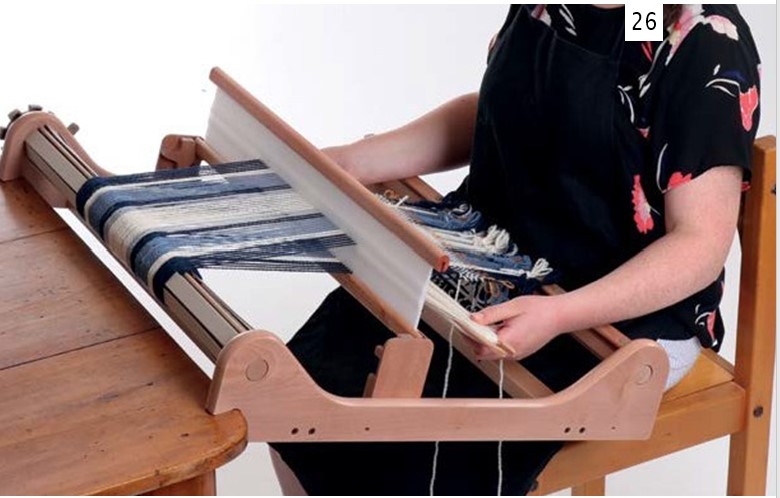
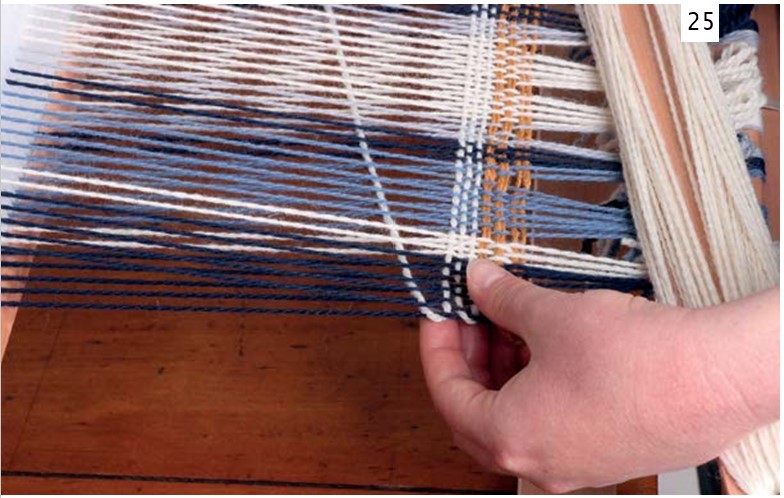
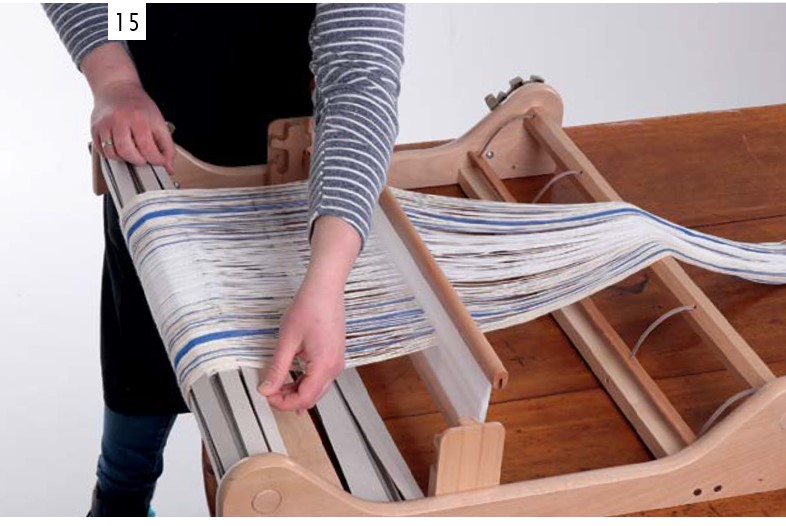
Continue weaving as per the last 2 rows until your work is approx. 8cm (3ins) from the reed. Now you need to advance the warp (winding the weaving on to the front roller).
PLACE THE REED INTO THE REST POSITION.

To release the tension on the warp, turn the back handle away slightly and pull the pawl out of the cog. Turn the handle towards the front of the loom so some of the warp unwinds, replace the pawl into the cog to stop it advancing too much
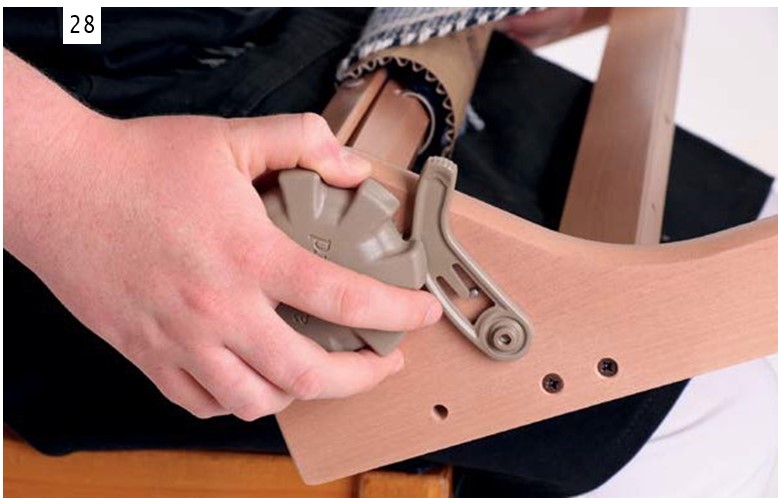
Now wind the front handle towards you until your work is approx. 5cm (2ins) from the roller. Check your tension. As you weave continue winding your work onto the front roller in this way.
Hint: Add a piece of cardboard to cover the knots as you wind your weaving onto the front roller.
Joining in a new thread: At some stage the yarn on the shuttle will finish. Wind some more yarn onto the shuttle. Overlap the new yarn across the old yarn into the same shed. Beat both yarns down together. You can trim the ends sticking out after you finish
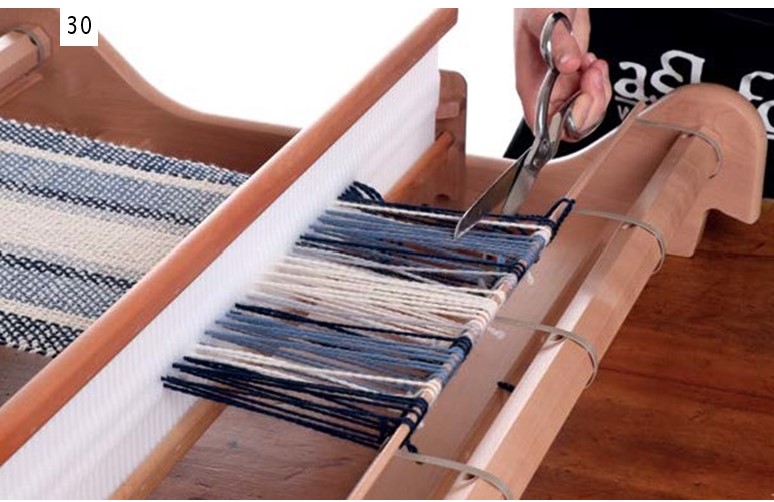
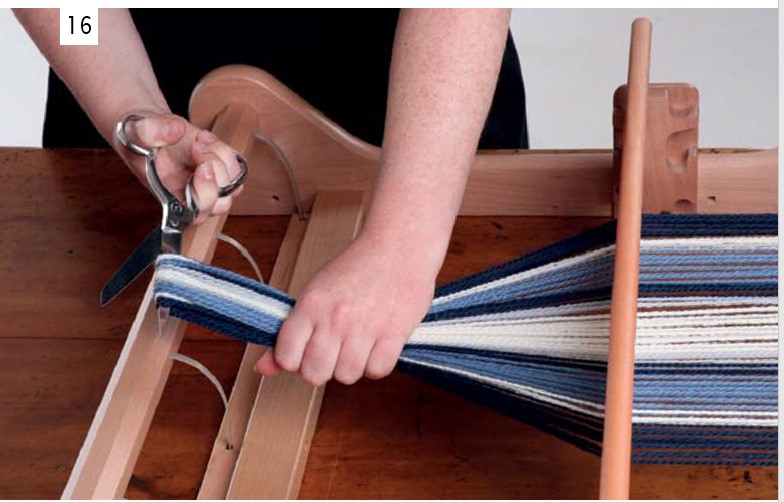
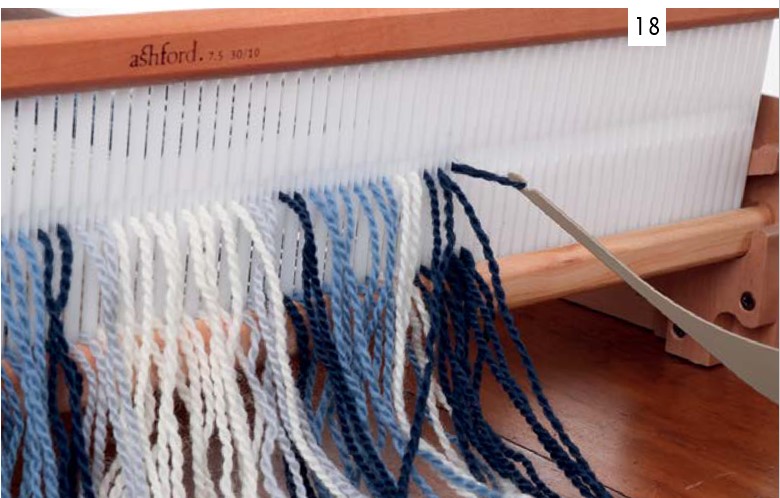
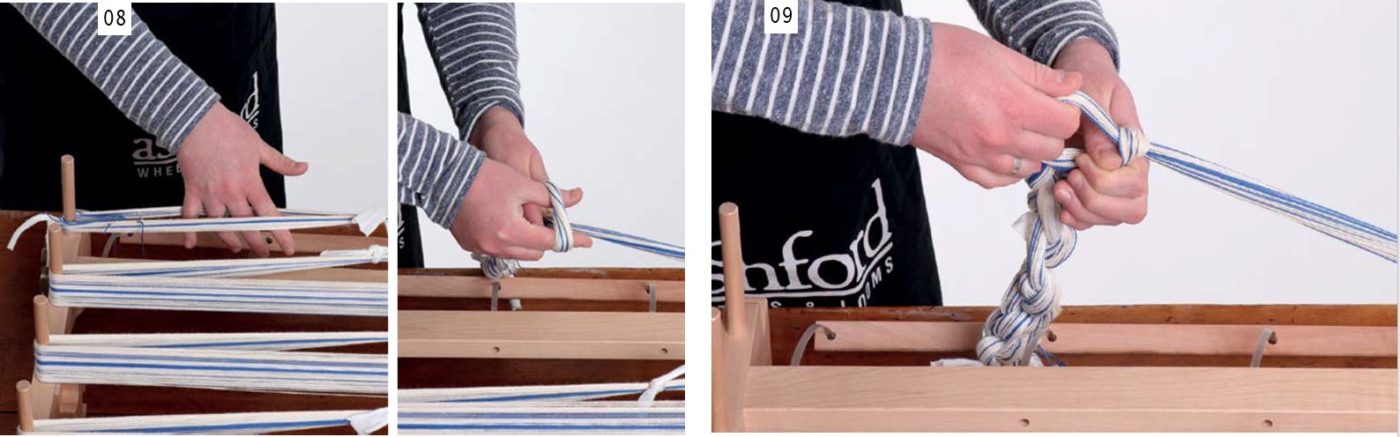
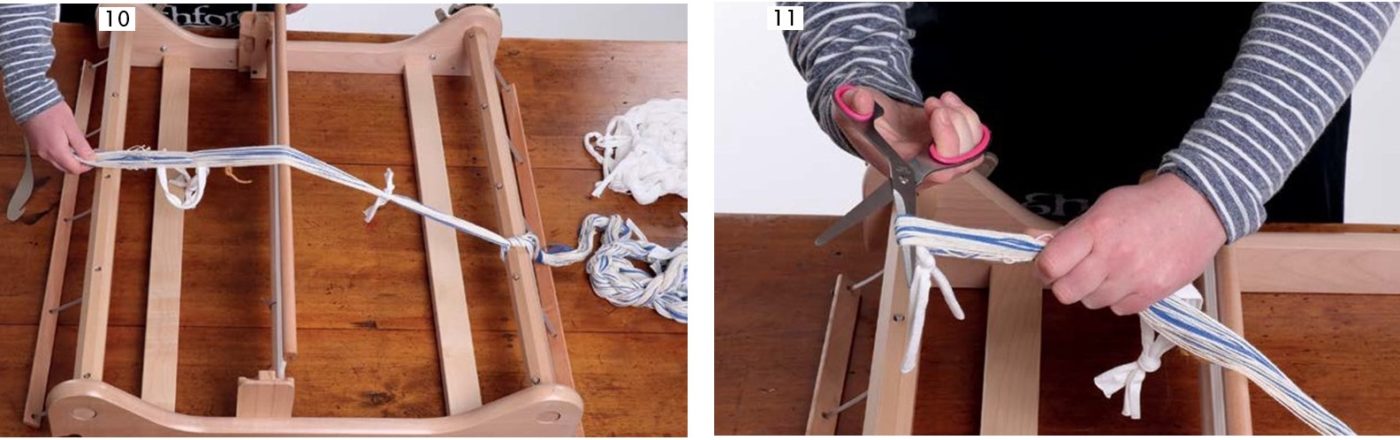
Continue weaving until the end. Cut the warp yarns along the back warp stick. Take care not to cut the warp stick ties.
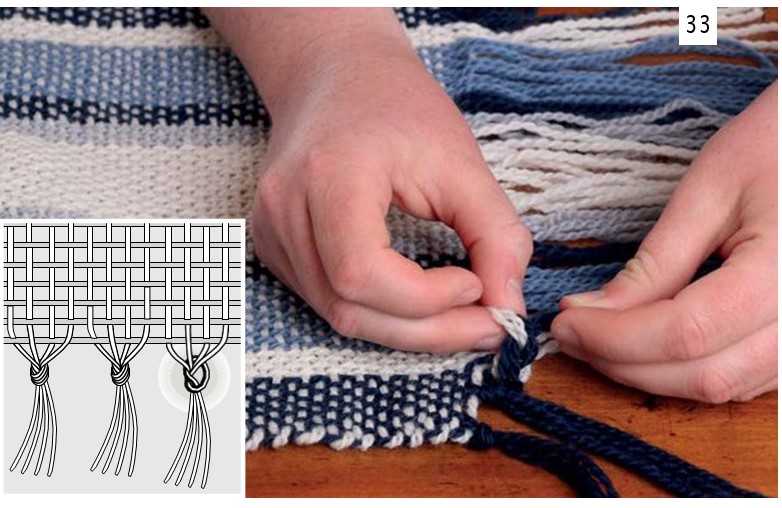
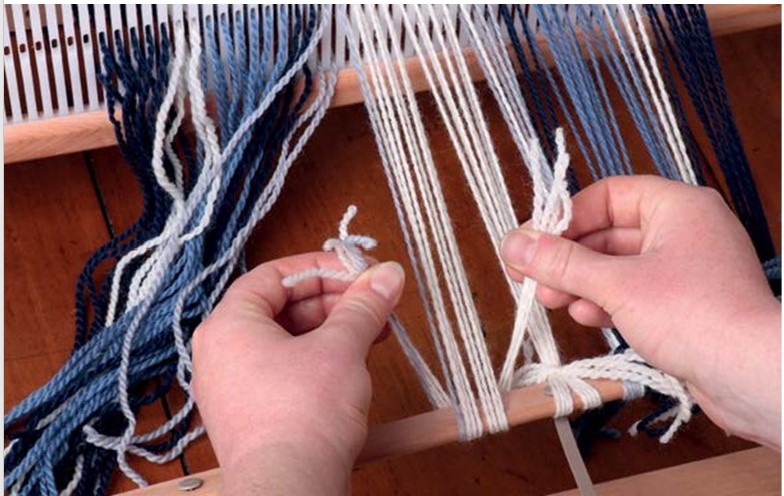
Tie the ends in groups of four. Use overhand knots. Darn the weft thread into your work using a wool needle or add the thread into the fringe. Alternatively, you can use a fringe twister for the ends. See the back page for more information
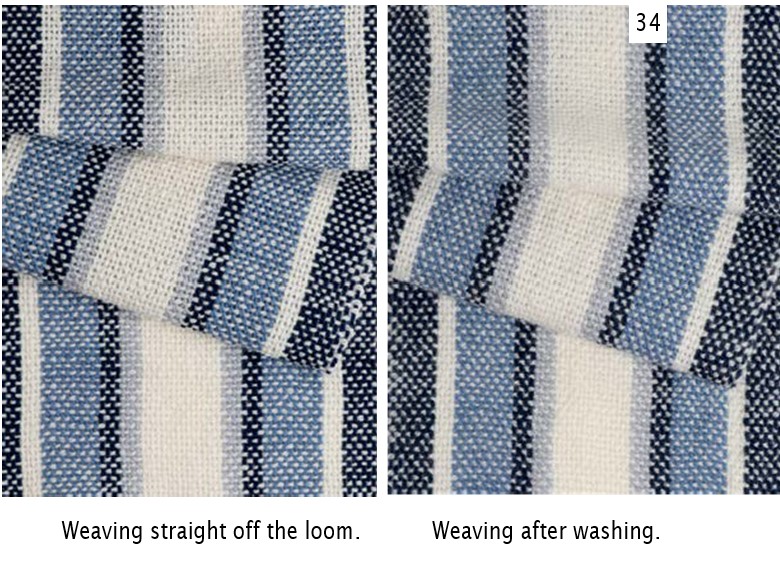
The woven work should be washed so the threads open up, bloom and fill the spaces to give the fabric a ‘finished’ look. See the back page for futher washing instructions.
ALTERNATIVE WARPING TECHNIQUE
When you learn to weave, there are always more than one way to do things. Warping is no different. By using the optional Rigid Heddle Warping Pegs with your loom you can use the indirect warping method. Some benefits of indirect warping are the flexibility to use one thread of one colour, it saves space, ensures even warp lengths and better tension control.
Calculate the length of your warp. Cut a piece of scrap yarn the correct length and use as a guide
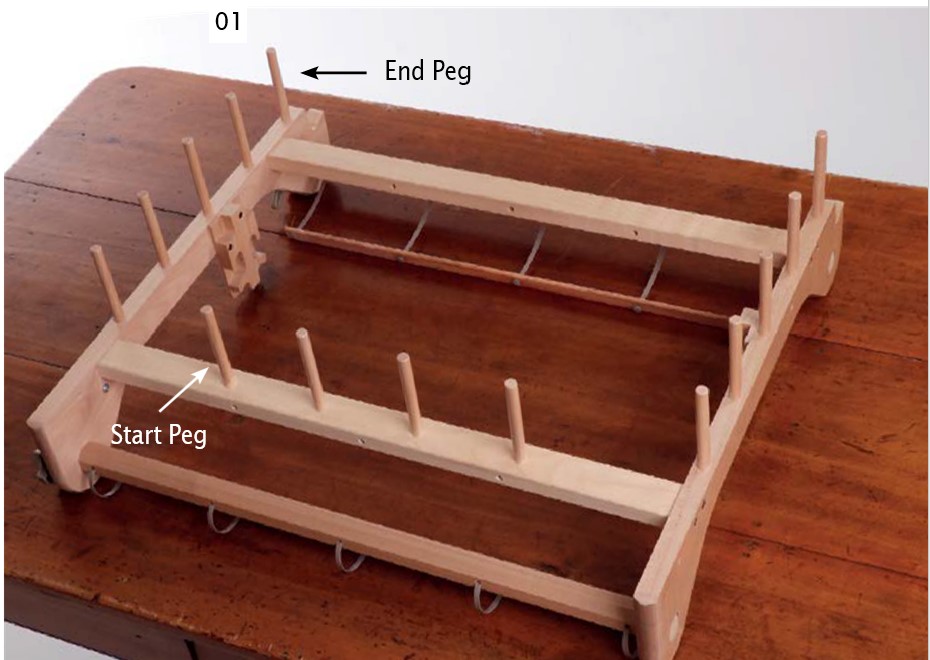
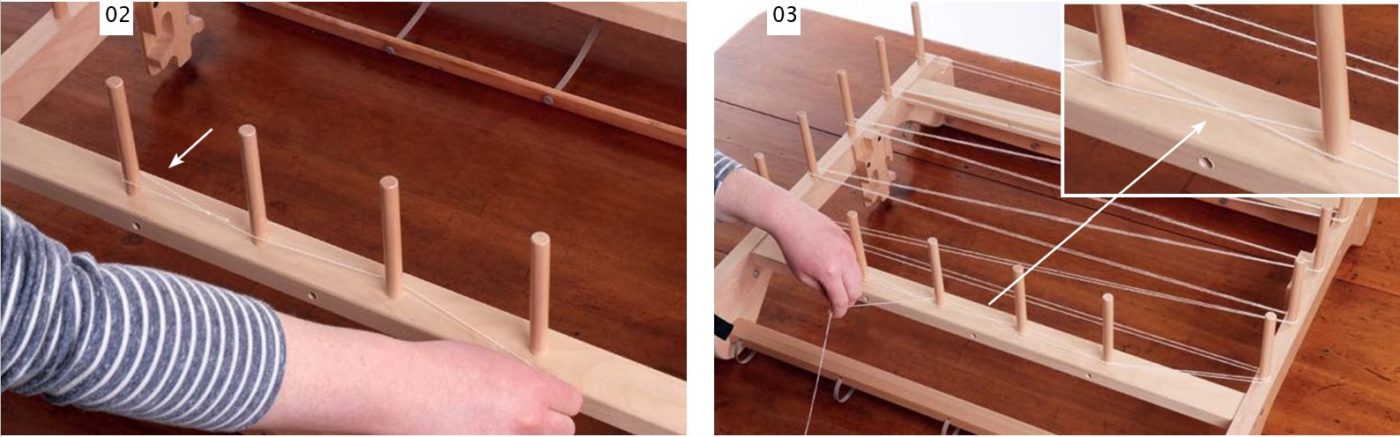
Tie the warp yarn to the start peg with a loop. Wind around the pegs for the required warp length and return following the same path back to the beginning
When returning back to the start you will be creating a threading cross between the second to last peg spacing. Create this cross by passing the thread up or down in the opposite direction to the previous thread. The threading cross keeps the yarn in the correct order for threading
When finishing a colour, tie off at the start peg the same way as at the beginning
If there is just one thread of one colour needed in the design, tie the yarn off at the end peg in the same way as the start. Then begin again from the start peg.
When all the yarn has been wound on, add choke ties to the warp to prevent the threads from tangling. Add a long loose tie through each side of the threading cross.
Note: For wide projects wind your warp in two or three separate chains
Also add tight choke ties at the start and end pegs and at regular intervals along the warp.
Now it is time to chain the warp from the pegs. To remove the warp begin at the end peg. Take your hand through the middle of the loop. Reach for the warp pulling it back through the loop
Put your hand through the new loop and continue chaining until you get close to the threading cross
Tie part of the unchained end to the front roller to keep it in place while threading
Hold the chain near the threading cross and cut the top loops.
Pick up the threading cross and insert your fingers on either side of the cross. Place the reed in the neutral position. Start threading the reed by taking the outer-most warp thread on the cross and thread it through the reed from the front of the loom to the back.
Unlike the direct method you thread slots and eyes (not just slots) sequentially.
Once all the warp yarns are threaded through each slot and eye, tie them to the back warp stick in small bunches. Please see steps 19 – 21 of the Scarf project
Untie the warp from the front roller. Now it’s time to wind the yarn onto the back roller, keep the warp under tension. A friend can help by holding the end of the chain out under tension at the front of the loom
Insert cardboard warp sticks as you wind, at least one per turn. Once finished leash on your warp.
Lastly you will need to spread your warp using some scrap yarn. See this video tutorial on Spreading the warp here
FINISHING
The woven work should be washed so the threads open up, bloom and fill the spaces to give the fabric a ‘finished’ look.
WASHING
Wash the scarf gently in warm water with a little detergent. Push up and down for a minute. Let the soapy water drain away and rinse the scarf in warm, clean water. Hang out to dry. Place the work over a towel so you don’t get a fold line on the fabric. While the work is still damp, cover it with a soft cotton cloth and press with a warm iron. Hang again until thoroughly dry. You did it! You can now proudly wear your first handwoven scarf!
Blog post proudly supplied by Ashford Wheels & Looms.
LEARN TO WEAVE WITH HELPFUL HINTS
Beating
Always beat gently. Sometimes the work will look a little open. Remember, the work is under tension on the loom and will come together when taken off. Also, the washing process will close the gaps a little.
Tension
Do not over-tension your warp. The warp threads only need enough tension applied to hold the reed in the up position. If your reed falls forward when in the up position, increase the tension slightly. If you have difficulty changing the reed to the up or down position, loosen the tension slightly. Over-tensioning the warp will put strain on the yarn, the loom and you!
Creating a twisted fringe
To quickly create an attractive evenly-twisted fringe use a Fringe Twister.
Or take a look at some of our other tutorials such as Peruvian Diamond Weaving
Start weaving with your rigid heddle loom & yarn
Rigid Heddle Loom – includes second heddle kit