Weaving
Have you discovered Peruvian Diamond Weaving on a Rigid Heddle Loom?
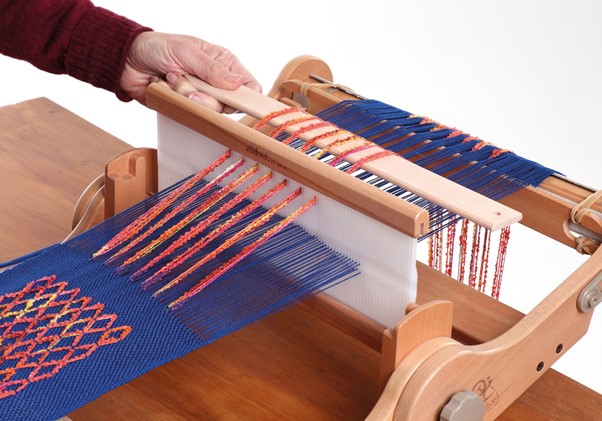
For rigid heddle weavers who like a challenge, why don’t you give it a go today! Create this striking surface design using a diverted or deflected supplementary warp. We have included a video of how to do this technique.
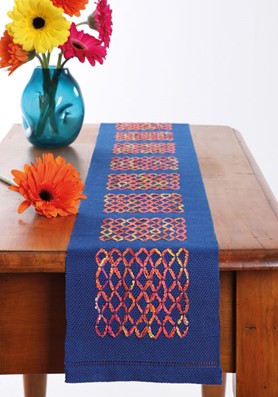
Start your diamond weaving
You will need:
Loom: 10″ (25cm) or wider rigid heddle loom
Reed: 15dpi (60/10cm)
Background warp and weft yarn: Ashford mercerised weaving cotton 5/2 (100% cotton, Ne 5/2, 848m/927yds, 200gm) 1 cone
Supplementary warp yarn: hand-dyed silk boucle 1oz (28gm)
Other: three pickup sticks, warp thread weights
Here’s how:
The total background warp ends: 120
Total supplementary warp ends: 14 (two in 7 slots)
Total background warp length: 7ft/2.1m
And Total supplementary warp length: 10ft /3m
Finished width: 7″ (17½cm)
Finished length: 53½” (136cm)
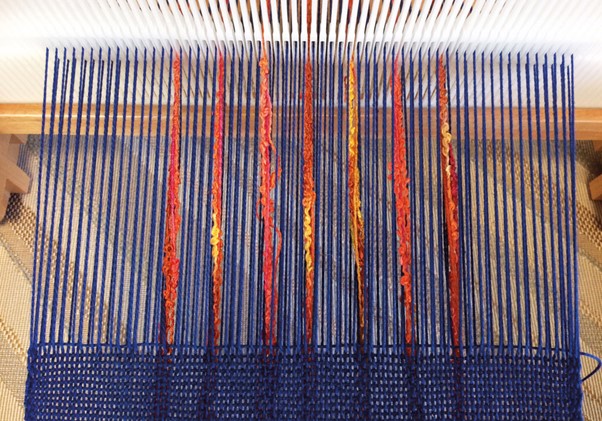
Thread seven pairs of supplementary warp threads
Warping for the diamond weaving pattern
1. Warp 120 ends in the 5/2 cotton, wind and tie on.
2. Place the first pair of supplementary warp threads through the centre slot. Repeat either side in every 5th slot for a total of seven pairs.
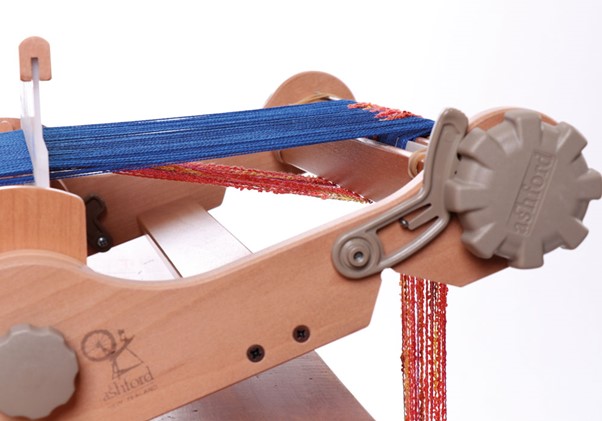
3. Tie the supplementary warp threads to the front warp stick. Hang the supplementary warp thread over the back roller and tie to a warp thread weight.
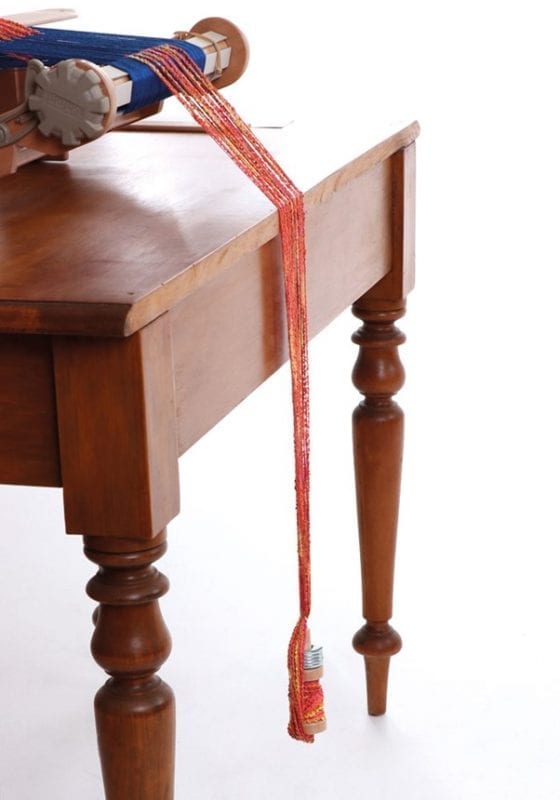
Preparing the Loom for this Project
Plain Weave Areas
Take pickup stick A behind the heddle and insert it to lower the supplementary threads below the background warp threads. Slide to the back when weaving the diamond pattern areas.
To weave plain areas at the beginning, the end, and in between the pattern areas, use only pickup stick A. Slide it forward and push down to lower the supplementary threads. With the reed in the down position and the shuttle on the right, weave the required amount.
Pattern Area
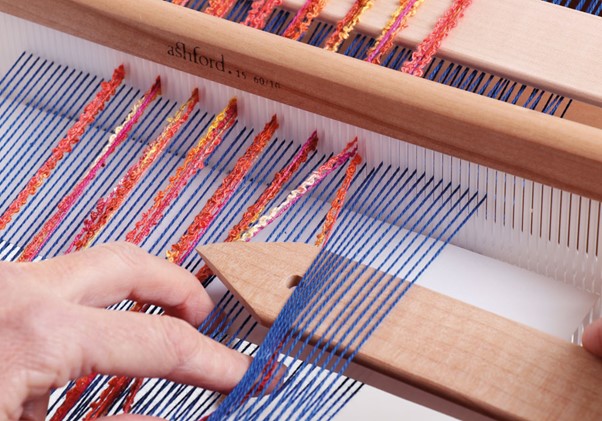
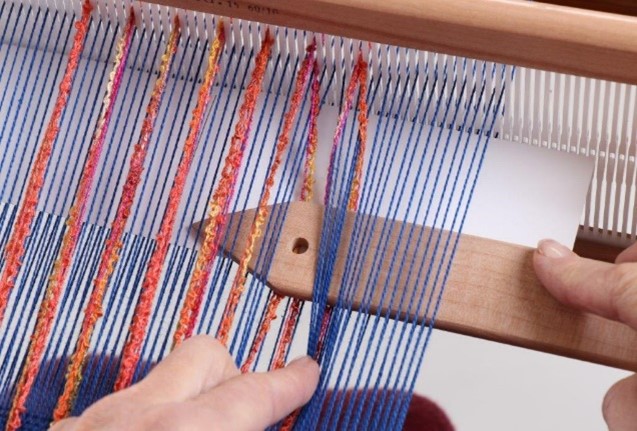
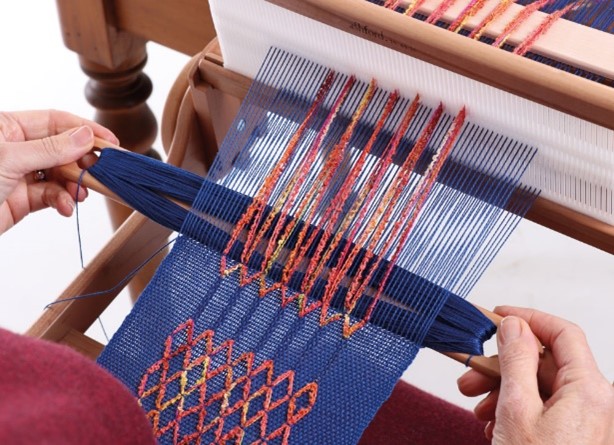
Push pickup stick A to the back. With the reed in neutral pick up the supplementary threads behind the reed and put on pickup stick B.
Pattern Sequence (Beat with the shuttle edge)
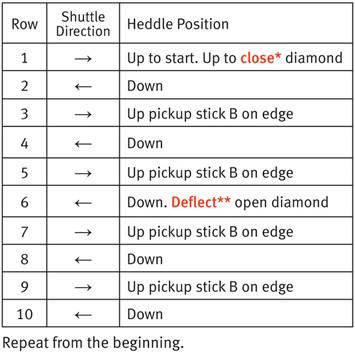
Close the Diamond
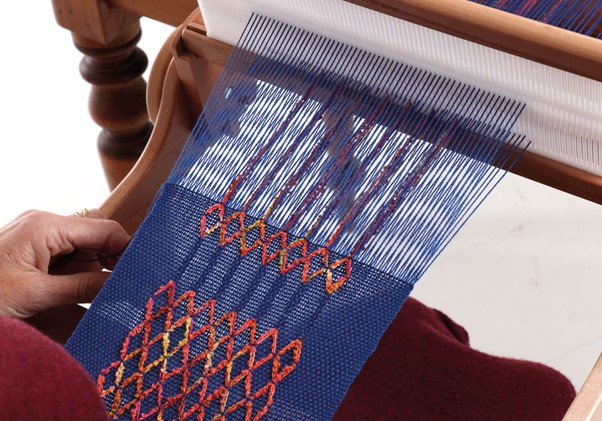
To close the diamond, remove pickup stick B and with pickup stick A lower the supplementary threads below the background warp threads. Weave one row.
Then, if you are weaving the pattern section, slide pickup stick A to the back and reinstate pickup stick B.
If you are weaving the border, keep the supplementary threads below the background threads with pickup stick A.
**Deflect one thread of the first supplementary warp pair, two slot threads to the right and the other thread of the pair, two slot threads to the left.
Insert pickup stick C in to the plain weave shed in front of the reed and bring it up two slot threads to the right of the supplementary warp. Place one supplementary thread under the pickup stick, [re-enter the stick and bring it up two slot threads to the left. Deflect one supplementary warp from the right-hand pair and one from the left-hand pair and place under the stick.] Repeat [ ].
The diamonds can be made larger or smaller by changing the spacing of the supplementary warp threads.
To Begin This Weaving Project
1. Start to Weave a plain weave heading
2. Weave two rows of a contrasting cotton (to be pulled out later and used as the cutting line).
3. Now Weave 5cm (2ins) plain weave in the 5/2 cotton (for the hem).
4. Weave one row of 1/1 Leno.
5. Finally Weave 3cm (1¼ins) plain weave.
6. Commence pattern sequence and repeat opening and closing the diamonds for four rows.
7. Repeat instruction 5 and 6 for required length.
8. Weave 3cm (1¼ins) plain weave.
9. Weave one row of 1/1 Leno.
10. Weave 5cm (2ins) plain weave in the 5/2 cotton (for the hem).
11. Weave in 2 rows in a contrasting cotton (to be pulled out later and used as the cutting line).
12. Weave 5cm (2ins) plain weave in the 5/2 cotton (for the end heading).
13. Cut and tie off.
Finishing
1. Remove weaving from the loom.
2. Remove the two rows of contrasting cotton threads and cut.
3. Secure ends.
4. Make hem to the Leno row – this becomes a decorative edge.
5. Sew in the supplementary warp ends on the reverse side.
6. Press with a damp cloth and lie flat to dry.
We also have a brilliant blog tutorial to weave your own table runner. To find it, click right here
Dont forget to stay up to date with the latest news on our Facebook Page
Blog post proudly supplied by Ashford Wheels & Looms.
Want more weaving, spinning or crafting news?
