What is Hemstitching?
Hemstitching in weaving is a simple, decorative way to finish the edges of your weaving project, giving it a neat and polished look. It’s often used at the beginning and end of scarves, table runners, or any woven piece where you want a clean finish without needing to sew a hem. With hemstitching, you secure the warp threads so they don’t unravel, while also creating a lovely, braided effect along the edge. It’s an easy technique that adds both function and beauty to your work!
What do I need to Hemstitch?
All you need is a weaving loom, yarn, shuttle, a wool needle, and your project idea. As you start, leave a thread that’s four or five times the width of your fabric. Choose a blunt needle—straight or curved, whichever you prefer (though many weavers like straight needles).
Basic Steps of Hemstitching
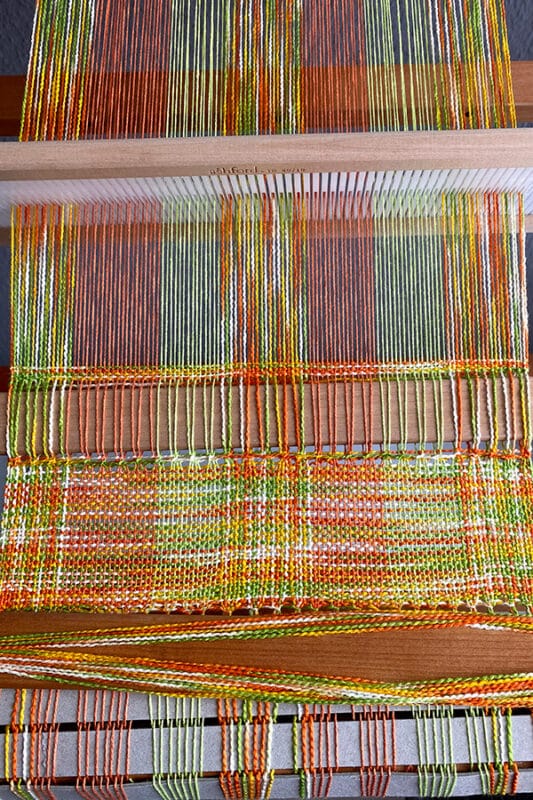
Hemstitching is much easier when your weaving is on the weaving loom under tension. As you start, leave a yarn tail about 3 or 4 times the width of your project
To hemstitch, place the reed in the neutral position. You can begin from the left or right, whichever feels more comfortable. Many weavers prefer to turn their loom around when they hemstitch.
You can adjust the size of the thread bunches too. With finer yarn, try using 5 warp ends instead of 3. If the first weft thread misses when starting, simply go over it to catch it, then continue under the next two.
What are the different types of Hemstitching?
There are a few different types of hemstitching you can try, depending on the look you want. The most common is the simple (or classic) hemstitch, which secures small groups of warp threads for a clean, classic finish. For a decorative touch, you might try a diagonal hemstitch, creating a criss-cross pattern across the edge of your fabric.
Another option is a double hemstitch, where you secure threads in one direction, then go back in the opposite direction for added strength and texture. Each style adds its own unique charm to your weaving
With the help of Ashford Wheels & Looms and some tutorial steps shared by Bianca Wenzel, from Germany and in the Ashfords ‘The Wheel’ magazine issue 33 we have compiled the following tutorial
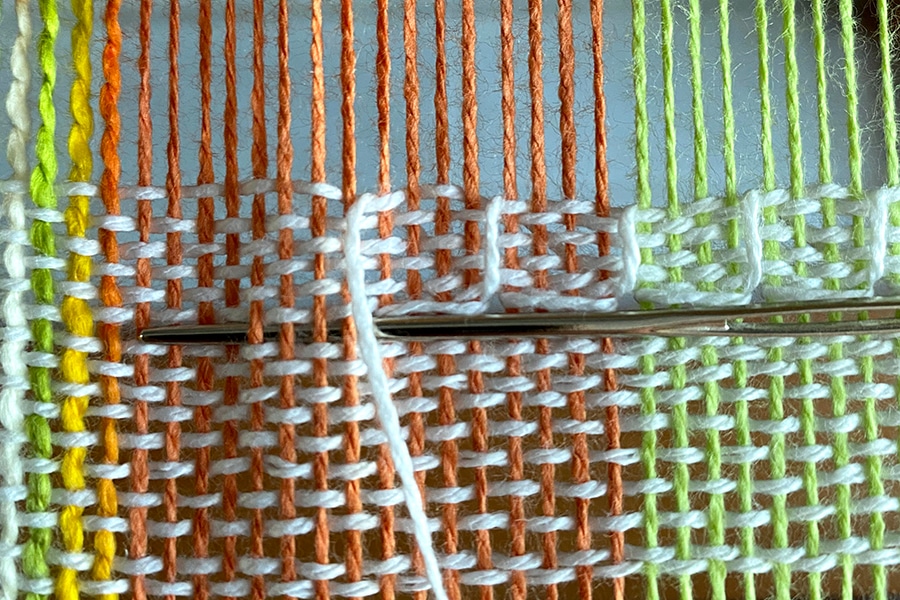
Simple (or Classic) Hemstitch
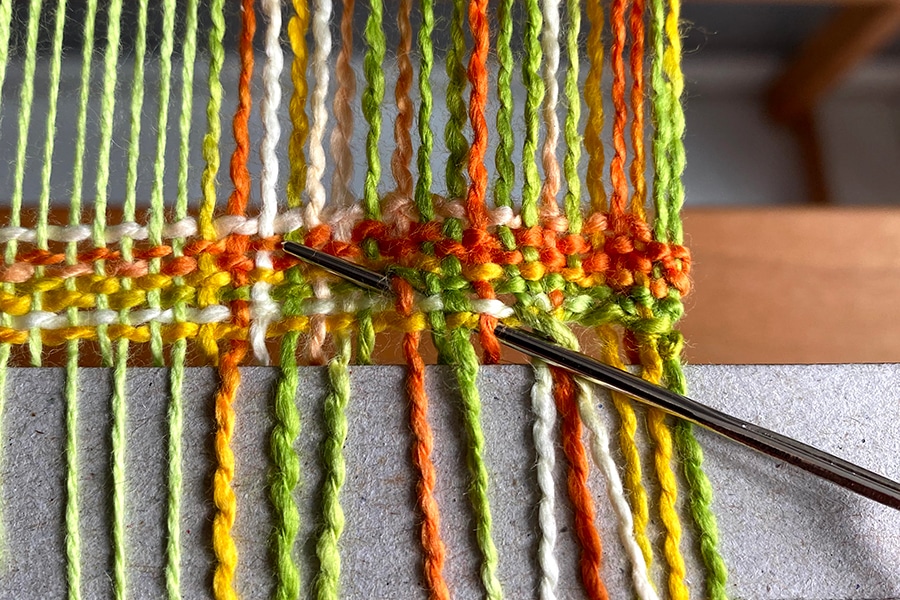
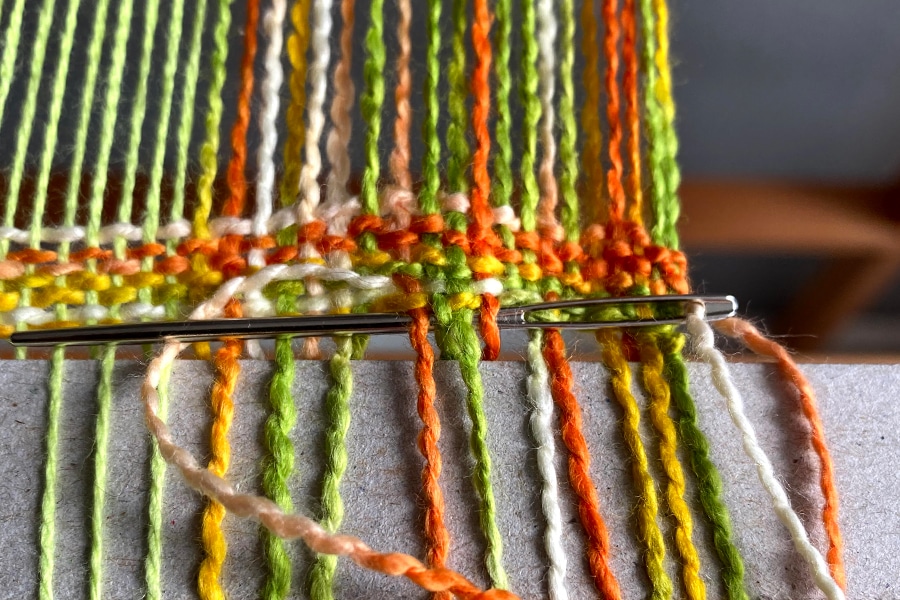
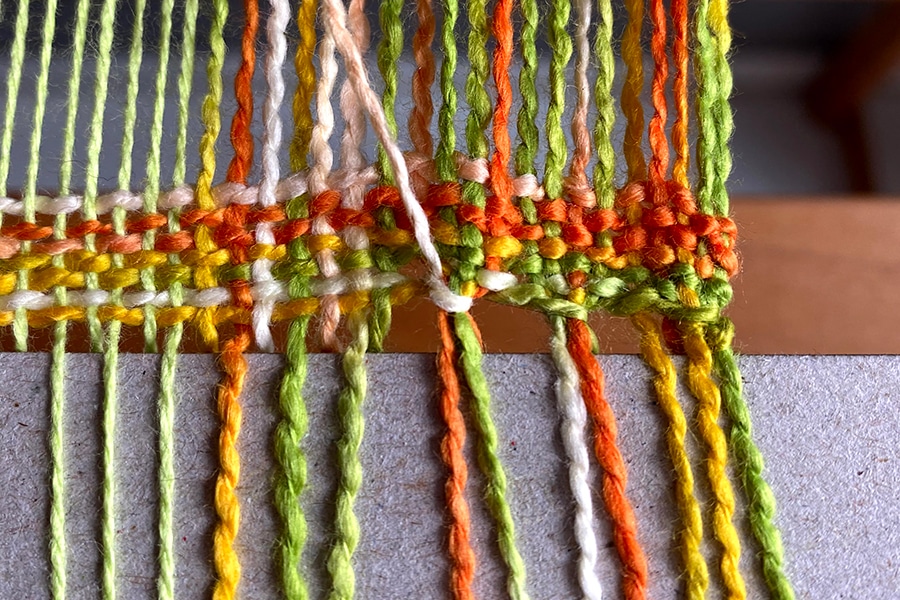
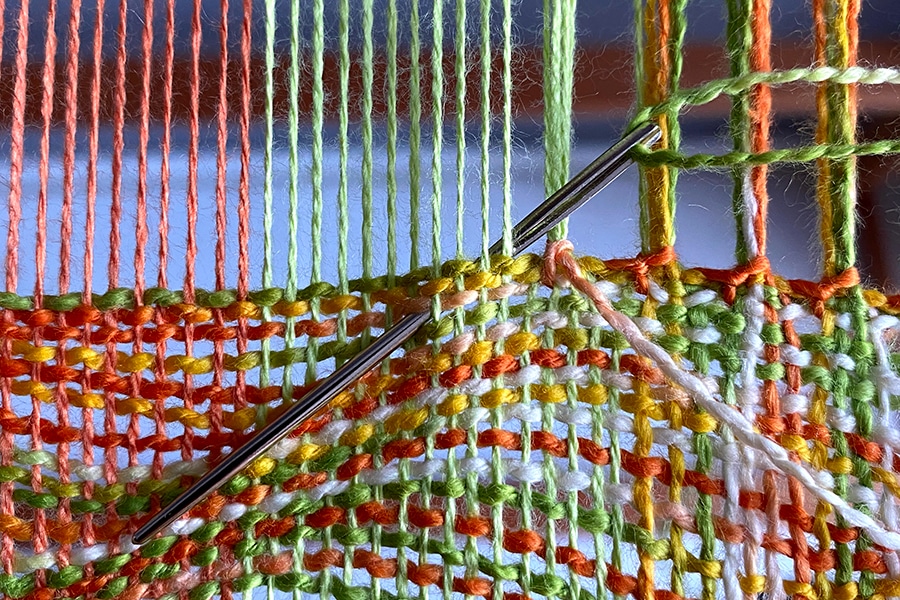
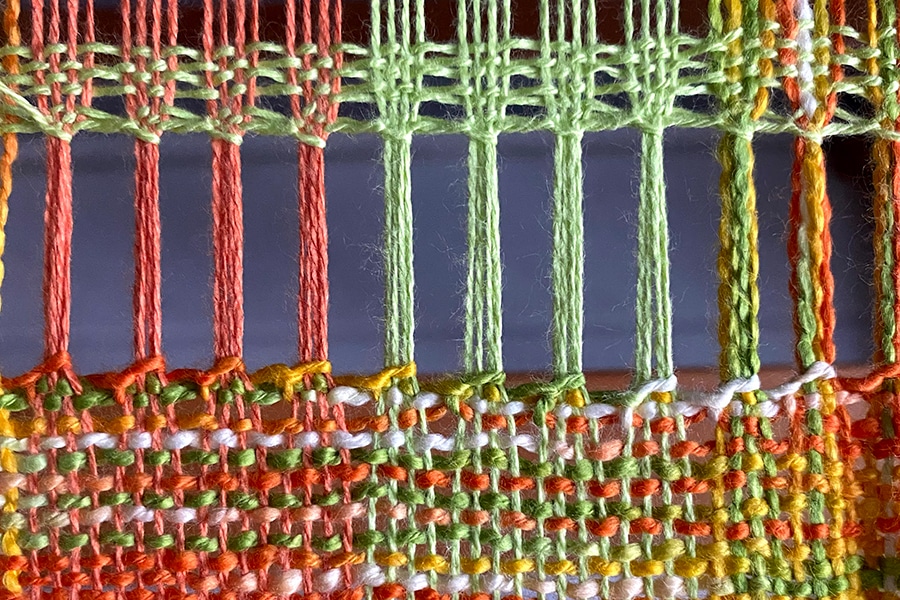
Hemstitching to secure your fabric is super easy. As you start weaving, leave a thread about four to five times the width of your fabric.
After weaving a few rows, thread the yarn tail through a wool needle.
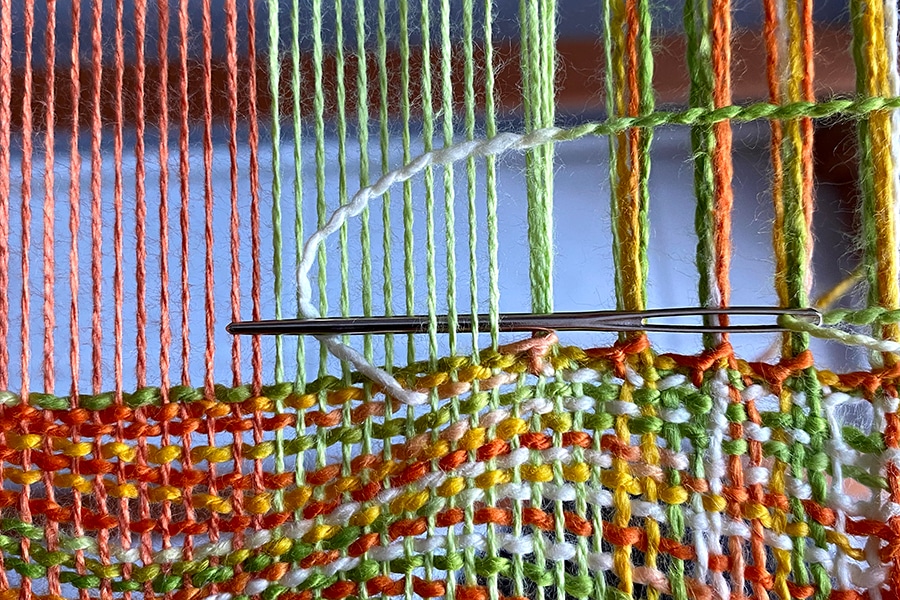
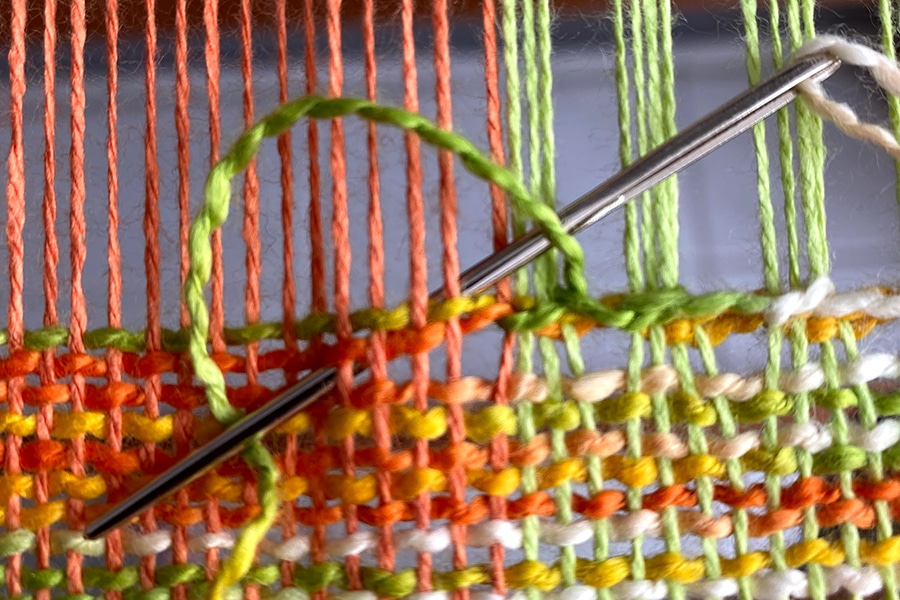
Now, decide how many threads you want your stitch to cover. For this example, go under four warp threads across and one thread along the length (weft). Pull the needle through, then make a small semicircle to the left. Pull the needle under the same four warp threads again and gently tighten.
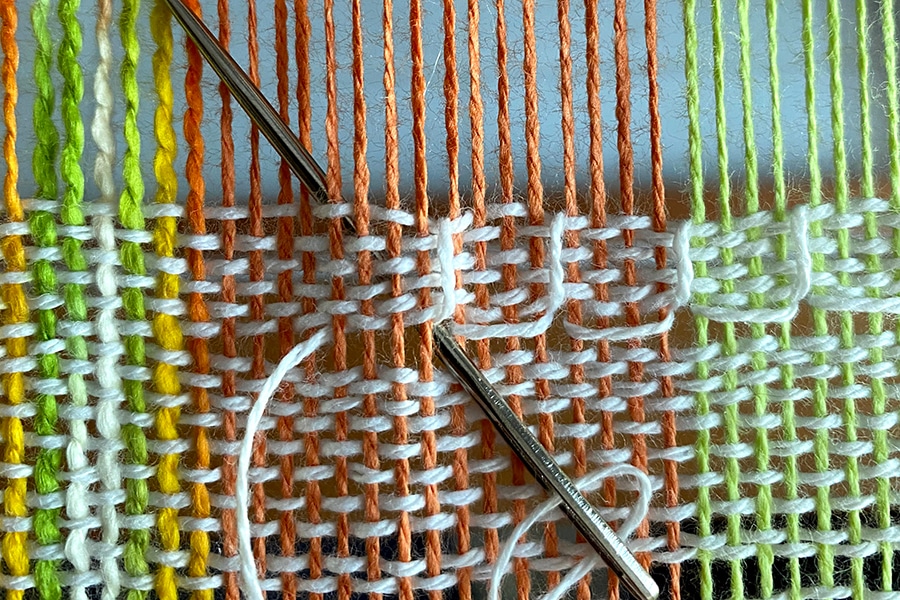
Steps 1a – 3a hemstitching when you start weaving.
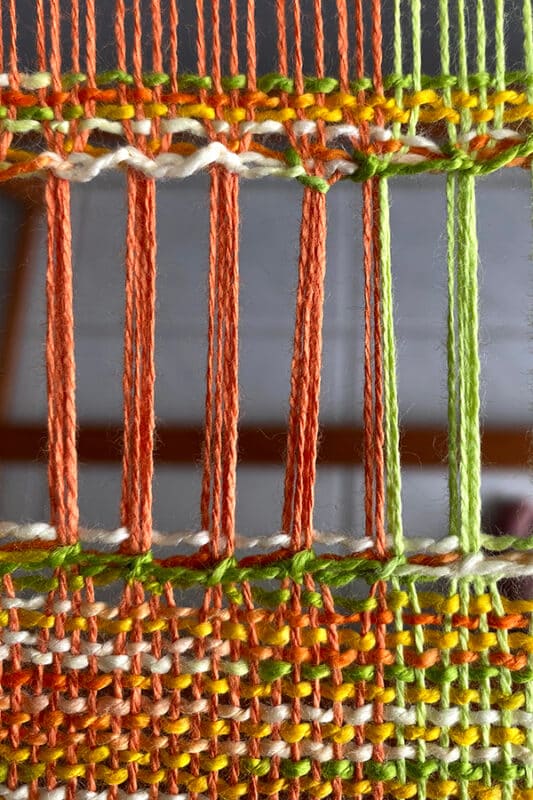
Steps 1b – 2b hemstitching at the end of your weaving.
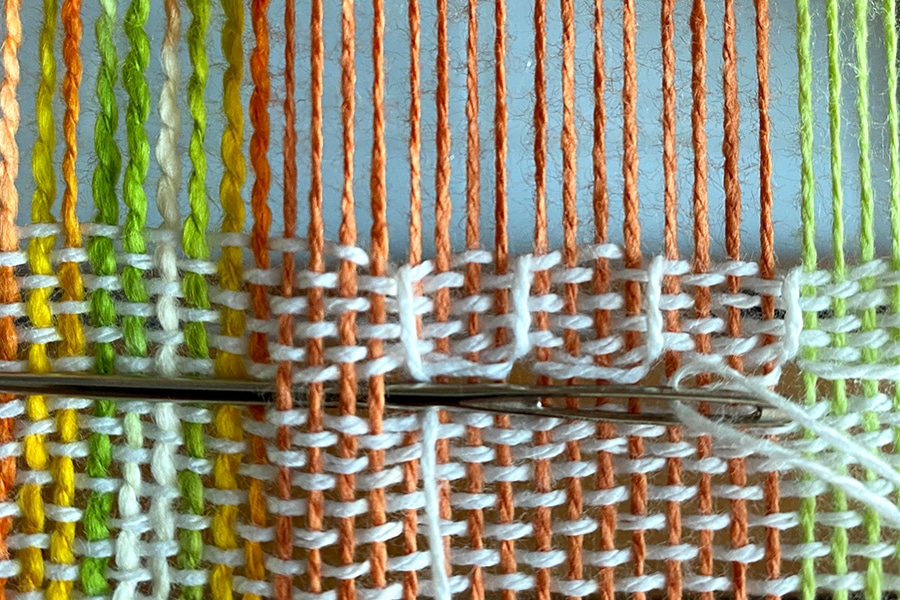
The Cheater Hemstitch
If you’re looking to make things a bit easier (and it’s totally fine!), you can try the “cheater hemstitch.” It combines all the usual steps into one. Simply take four warp threads across and one weft thread down, then pull the needle under the four warp threads and place the thread in a semicircle over them.
That’s it—you’re done! In the photo, you’ll see the cheater stitch at the top and the classic stitch below. Many weavers prefer the classic one, but both work beautifully
The Italian Hemstitch
As you might have guessed, the Italian hemstitch offers endless possibilities! You can choose a square shape or go for more of a rectangle—it’s up to you. Once you’ve decided, start by threading under four warp threads (or however many you prefer) and pull the needle through. Next, pierce the needle diagonally from the starting point, under as many threads as you like (again, four in this example), and pull through. Finally, stitch horizontally from right to left along the weft row, securing the warp threads. That’s how the Italian hemstitch adds its charm to your woven piece!
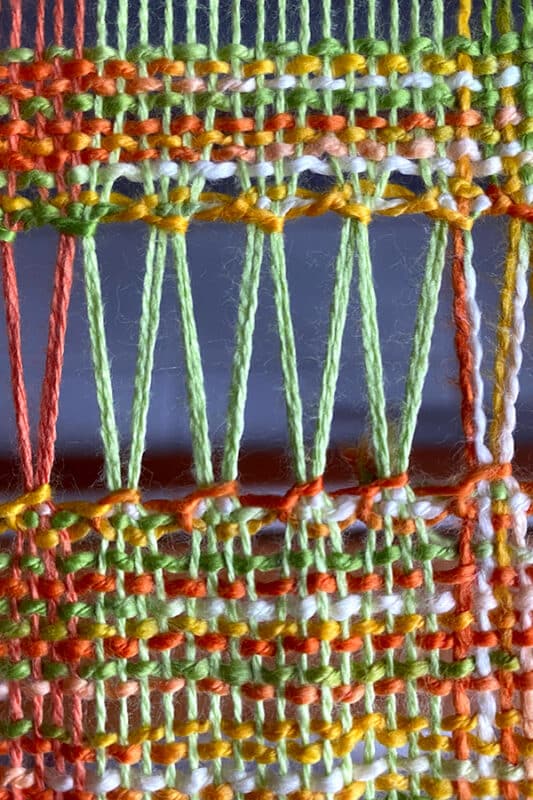
Zigzag Hemstitch
This is a wonderful decorative element with so many possibilities. In this example, the hemstitch was done over four warp threads in width and three weft threads in depth. Then, a pickup stick was inserted (though a piece of cardboard or something similar would work too). After placing the stick, a few rows were woven, and the hemstitch was started again, this time with two threads in width, eventually continuing with four threads. This creates a staggered pattern that looks beautiful. You can easily change the width and the number of warp threads to create different looks—just stagger the stitches, and the possibilities are endless!
The Ladder Hemstitch
The ladder hemstitch is quite like the zigzag stitch. Start by choosing how many warp threads to bundle together with your hemstitch. If desired, a spacer can be inserted to create separation between the rows. After weaving a few rows, repeat the process by bundling the same number of warp threads with the hemstitch. This technique creates a charming ladder-like effect in your weaving!
Hemstitching is a fantastic technique that adds both function and flair to your woven projects. Whether you’re opting for a classic finish or exploring creative variations like the cheater, Italian, zigzag, or ladder hemstitch, each style brings its own special touch to your work. Remember, it’s all about experimenting and finding what suits your project best. So, gather your loom, yarn, and wool needle, and have fun adding those beautiful finishing details. With hemstitching, you’ll elevate your weaving to new levels of charm and elegance!