Spinning
Spinning Wool on the Ashford Traditional Wheel
Learn to Spin Wool on the Ashford Traditional Wheel
When you first start learning to spin wool, you first need to learn to use your spinning wheel, you cant go past the amazing (and free) tutorials from Ashford Wheels and Looms.
The great thing about Ashford spinning wheels, is that they are designed to help you spin wool with ease.
There are many different ways to spin. Soon you will be developing your own style and creating many different kinds of yarns. For this instructional, use Ashford wool sliver. However, other fibres such as silk, linen, cotton and many animal fibres can also be spun on Ashford wheels.
All Ashford spinning wheels have similar parts and function alike. This tutorial uses the Traditional spinning wheel to teach you how to spin.
Parts
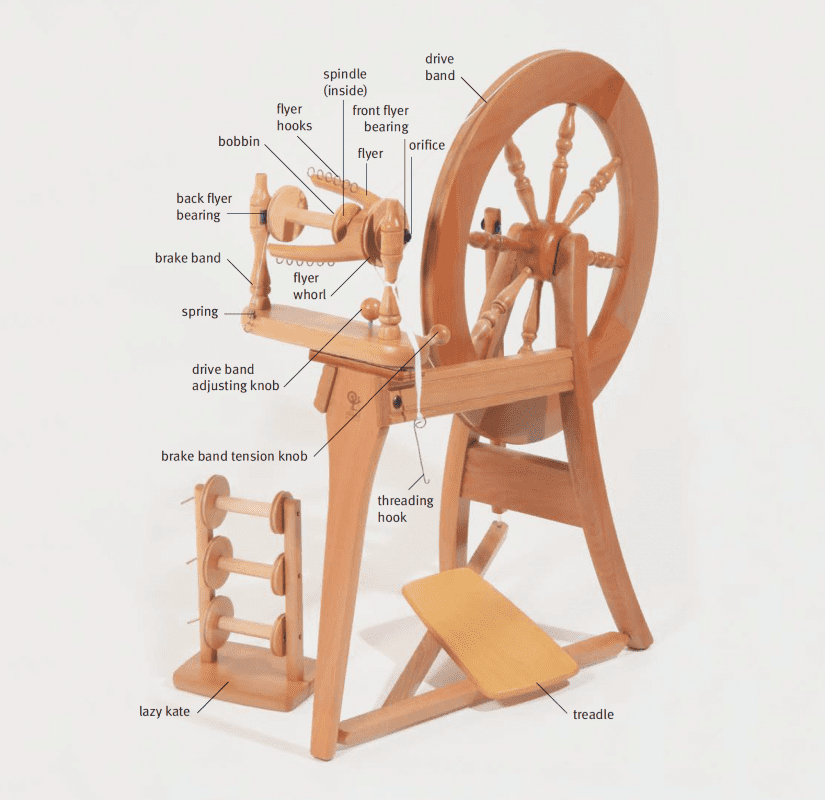
First become familiar with the names of the parts – treadle, bobbin, flyer and whorl, spindle, orifice, flyer hooks, threading hook, drive band, brake band, adjusting and tension knobs, back and front support bearings, lazy kate.
Brake Band
Turn the brake band tension knob until the springs just begin to stretch.
Do not over tighten or the yarn may break and the wheel will be hard to treadle.
Drive band
Single drive – place the drive band over the largest flyer whorl.
Double drive – place the drive band over the largest flyer whorl and the smaller bobbin whorl.
READY TO BEGIN
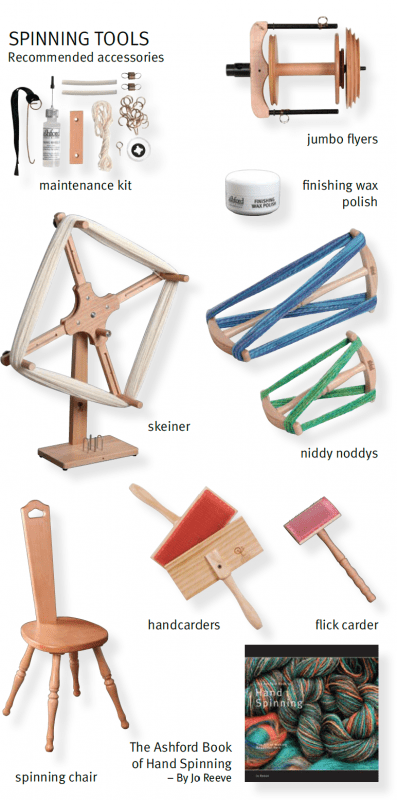
You will need:
Approx. 50grams wool sliver
A 1.5metre (5ft) length of medium weight yarn for a leader yarn and a 10metre (30ft) length for practising
A chair
A niddy noddy
PRACTICE
Go through each step taking time to feel the rhythm of treadling and working with your hands.
LUBRICATION
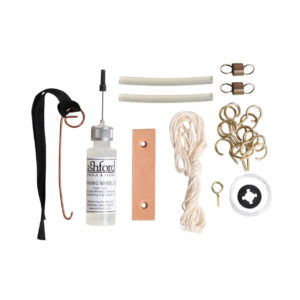
Regularly apply a drop of oil to all bearings to make treadling easier. Refer to the assembly instructions for details.
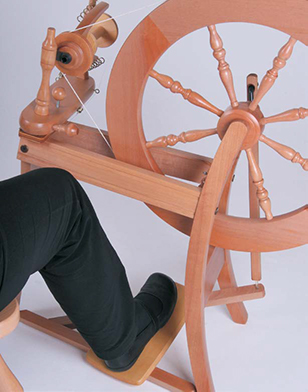
TREADLE: Sit on a chair in front of the wheel and place your foot on the treadle. Turn the wheel in a CLOCKWISE direction with your hand, and start treadling. Use a heel and toe action. Stop and practise starting again until you feel comfortable treadling.
Note: If treadling seems hard loosen the tension on the drive band with the adjusting knob. If the wheel slides on the floor, push down with your foot, not away. Place a rug under the chair and wheel.
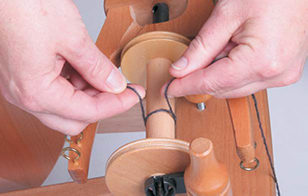
TIE THE LEADER: Start with a leader yarn on the bobbin. Tie a 1.5metre (5ft) leader yarn firmly onto the bobbin.
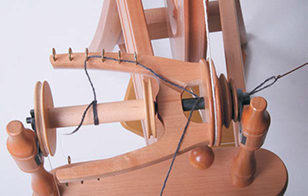
Take the leader yarn over the 4th hook and pull it through the orifice with the threading hook.
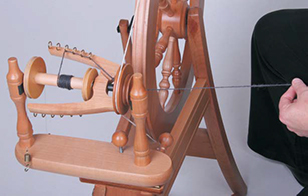
Hold the leader in your left hand and turn the wheel clockwise 3 times. This starts the yarn winding onto the bobbin. Stop when 50cm (20ins) of yarn is left in front of the orifice.
SPINNING WOOL PRACTICE:
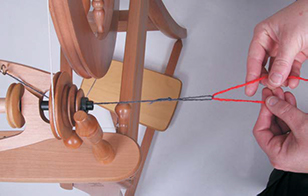
Make a loop at the end of the yarn. Take the 10metre (30ft) length of yarn, carry it through the loop and double it back about 10cm (4ins).
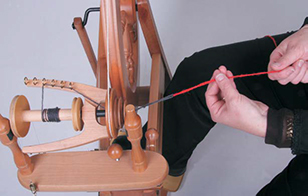
HANDS AND FEET: Hold the yarn at the loop with your left hand. Start treadling with the wheel turning clockwise. Feed the yarn into the flyer orifice with your left hand.
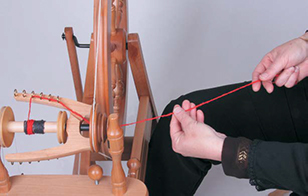
Allow the yarn to slide through your right hand.
PRACTISE THE DRAFTING ACTION:
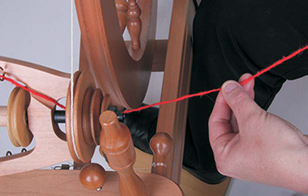
1. Pinch the yarn between your fingers. 2. Relax the pinch slightly and slide your fingers towards you – the twist will follow. 3. Pinch again when the twist has carried down the length of the yarn. 4. Feed the yarn into the orifice and onto the bobbin.
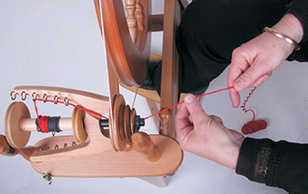
Repeat this until you come to the end of the yarn.
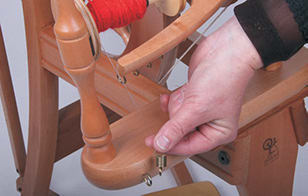
Lift the brake band off the back of the bobbin (single drive) and pull the yarn back through the orifice. Replace the brake band and practise the drafting action again. Once you feel your hand and foot action is co-ordinated you are ready to start spinning with the sliver.
Spinning the fibres
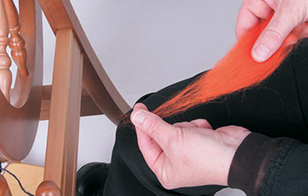
SPINNING WOOL: Take a length of wool sliver. Pull some fibres out of the sliver.
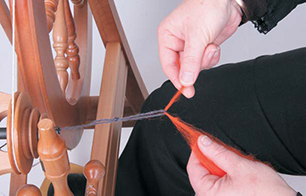
Take these fibres through the loop and double back. Start treadling slowly clockwise until there is a light twist in the fibres around the leader. Now you are ready to begin drafting and spinning a yarn.
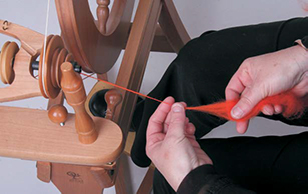
Note: The pinching fingers of your left hand prevent the twist entering the undrafted sliver. If this happens stop treadling and pull the spun yarn from the sliver and start again.
Hold the sliver lightly in your right hand and allow the fibres to pull out easily. This makes it easy to spin a consistent yarn.
JOINING THE YARN:
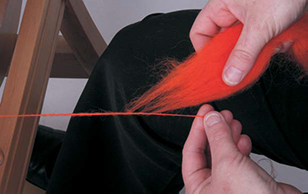
Treadle clockwise and hold the spun yarn in your left hand. Place more sliver alongside. Allow the fibres to catch and twist into the yarn. Pinch the fingers of your left hand in front of the join and start drafting the fibres again.
HINTS FOR THIS STAGE:
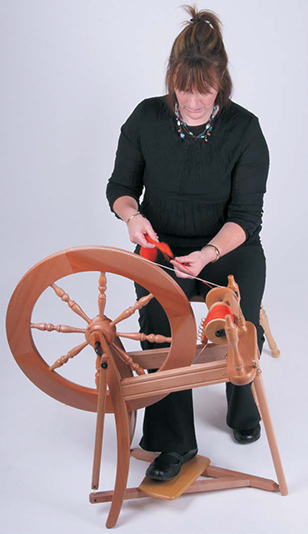
- Do not sit too close to the spinning wheel. Relax, lean back and leave room for your hands to work.
- Uneven yarn is OK – your first handspun will be a beautiful “fancy yarn.”
- Take time and you will work out your own rhythm for spinning wool
- If you lose the yarn down the orifice, find the end and use the threading hook to pull the yarn back through the orifice.
- If the yarn is not winding on to the bobbin –
a) Slightly tighten the brake band tension knob (single drive) or the drive band adjusting knob (double drive).
b) Check that the yarn has not caught on a flyer hook or in the orifice. - You can vary the amount of twist in your yarn by changing the speed of your treadling or hand movements.
FILLING THE BOBBIN:
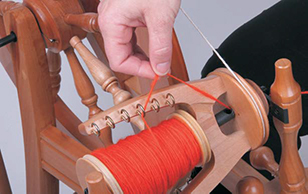
As the yarn builds up on the bobbin move the yarn to the next hook. Do this often working backwards and forwards over the hooks until the bobbin is full.
CHANGING THE BOBBIN
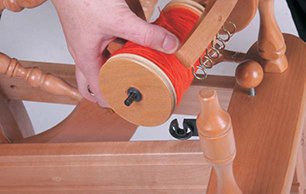
Single Drive: (See step 28 for changing of the double drive bobbin) Lift the brake band from the bobbin. Hold the back of the bobbin, lift the spindle out of the back flyer bearing and slide off the full bobbin.
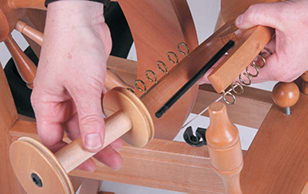
Slide an empty bobbin onto the spindle and click the spindle back into the bearing. Replace the brake band and check the tension.
PLYING:
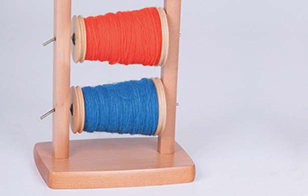
We recommend you ply two single yarns together to a make a strong, balanced 2 ply yarn. Place 2 full bobbins onto the lazy kate, both large ends on the same side. Place an empty bobbin on the flyer. Tie a leader yarn with a loop and pull it through the orifice as before.
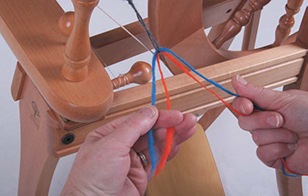
Take 1 yarn from each bobbin on the lazy kate, put them through the loop and double back about 10cm (4ins).
This spinning wool tutorial supplied by Ashford, continues further in the free downloadable PDF. For the entire tutorial, simply Click on the button below to download your own copy
We have so many more tutorials. Learn to use a niddy noddy here, knit a boomerang shawl, or wonderful ways to use your drum carder
Blog post proudly supplied by Ashford Wheels & Looms.
-
Corriedale Dyed Sliver – 100gm Bag$12.50 – $14.00 inc GST
-
Maintenance Kit for Ashford Spinning Wheels$30.90 inc GST

