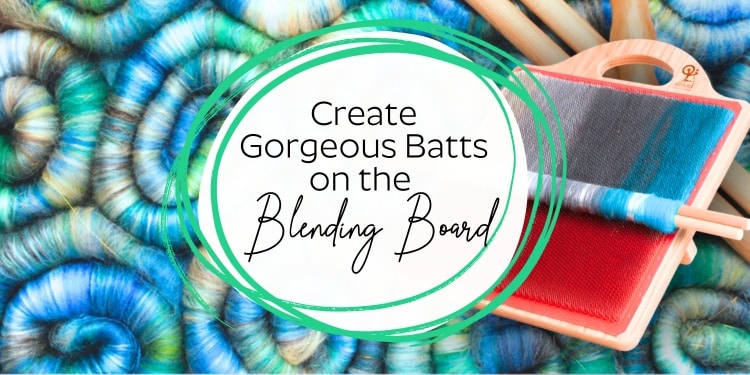
One of our most popular accessories that we sell, is the Ashford Blending Board. It’s not just versatile and portable, but it’s also a game-changer when it comes to blending fibres into beautiful, gradient batts.
Whether you’re watching your favourite movie, or just want to enjoy some quiet time, the blending board is your best companion. Keep reading and we’ll walk you through the process of using it to create a stunning gradient batt, using all of your favourite colours.
So, grab your board, some fibre, and let’s get started!
Why the Ashford Blending Board is so popular
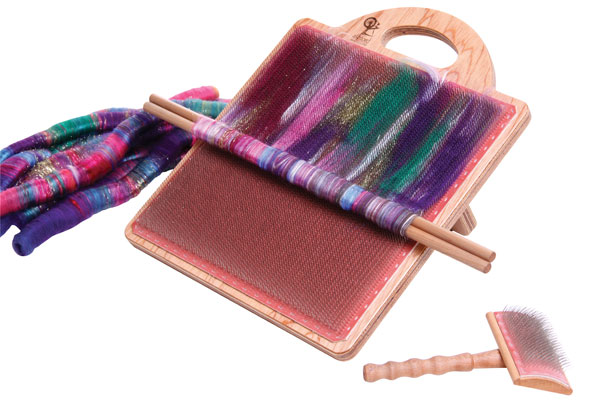
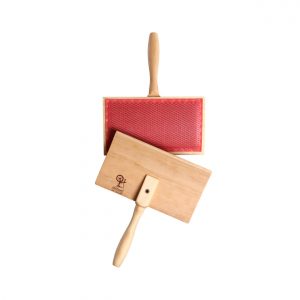
Let’s start with why the Ashford Blending Board is a staple in so many craft rooms. First off, it stores flat, making it super portable. You can sit it on your lap or place it on a table, and it’s much quicker than using hand carders. What really seals the deal, is that it’s so versatile—you can make both rolags and fibre batts with ease.
The Ashford Blending Board comes with a pair of dowels and an adjustable stand, which can be rotated to fit comfortably between your legs if you’re using it on your lap. This little feature is a lifesaver when you’re trying to keep your hands steady.
Creating a Gradient Batt: Step-by-Step Instructions

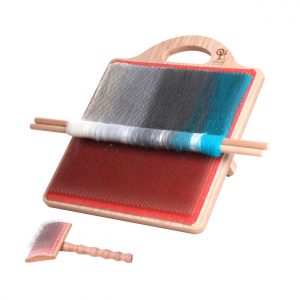
Now, let’s dive into the fun part—creating a gradient batt of fibre. We’re going to work from left to right on the board, the first of your chosen wool colours, moving through each one in your chosen order. The result will be a gorgeous gradient that’s perfect for spinning into yarn or using in other projects.
Step 1: Prepping Your Fibres
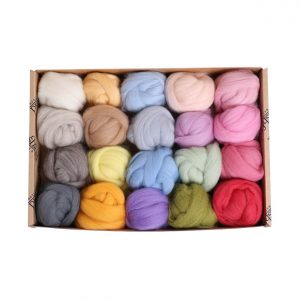
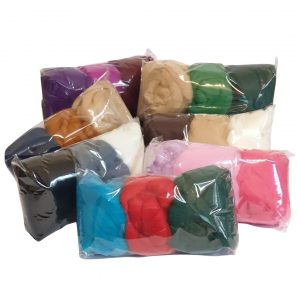
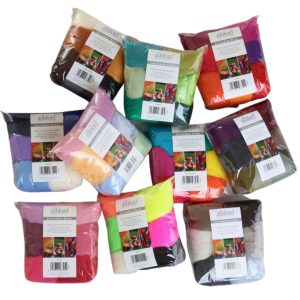
For this project, we suggest using Corriedale wool. The colours available are stunning. And you can even buy a 7 colour pack to get started
Starting with your first colour, place it at the top left of the board. Here’s how to get started:
1. Drag the Sliver: Take a small piece of your first fibre and drag it down the board, leaving a thin layer. You want to cover about a 4-inch wide strip. Repeat this process to build up a nice, even layer.
2. Build the Gradient: Next, grab your next colour and create another 4-inch wide strip right next to (and just overlapping) the section with the first colour you added. Repeat with all of your colours, creating a smooth transition from one colour to the next.
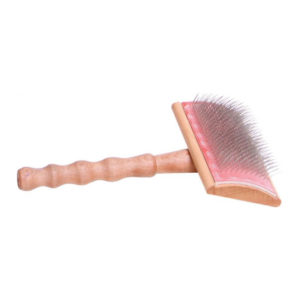
3. Blend with the Board: Once you’ve got your first layer down, use the blending brush to gently brush the fibres down the board. This helps blend the colours together, creating a smooth gradient.
Step 2: Building Layers
Your first layer will give you a glimpse of the beautiful gradient you’re creating, but we’re not done yet! To really bring out the colours, you’ll want to add 3-4 more layers of fibre, following the same process. Here ou can also add some sparkle with the fabulous Angelina fibres:
1. Layer and Overlap: Continue laying down your fibres in the same order, with slight overlaps between colours. Brush the fibres down after each layer to keep everything smooth and well-blended.
2. Check the Progress: After a few layers, you’ll notice the fibres reaching the tips of the tines (those metal spikes on the board). This is your cue that you’re almost ready to remove the batt.
Step 3: Removing Your Batt
Once your fibres have reached the tips of the tines, it’s time to remove your batt. This is where the dowels come in handy:
1. Position the Dowel: Place one of your dowels at the bottom of the board, right under the fibre ends that are overhanging.
2. Sandwich the Fibre: Take the second dowel and place it directly over the first one, sandwiching the fibre ends between them.
3. Roll It Up: Hold the dowels tightly and slowly roll them up the board, coaxing any stubborn fibres out with the blending brush handle if necessary.
And there you have it! Your batt will now be rolled neatly around your dowels. To finish, slide one dowel out at a time and unroll your batt to admire your work. If you prefer, you can leave it as one big rolag without unrolling it.
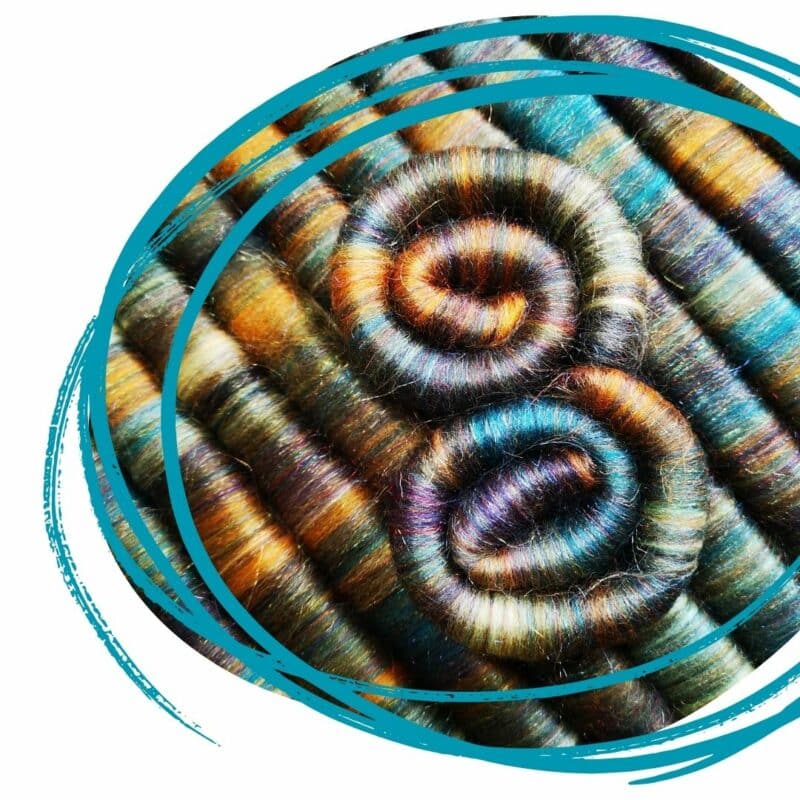
Step 4: Creating Puni-Style Rolags
What is a puni style rolag?
Puni-style rolags are like the perfect middle ground between traditional rolags and punis. They’re smaller in diameter than rolags but a bit chunkier than punis. They’re less blended and less dense than traditional rolags, but still give you that satisfying compact feel since they’re rolled on a stick. Think of them as the Goldilocks of fiber prep—not too tight, not too loose, but just right!
If you’re more of a puni-style rolag fan, you can make these too! Just stop adding fibre after the first layer and roll it off using the dowels. The key is to roll it as tightly as you can. Once it’s rolled, remove the dowels one at a time, and don’t unroll the fibre.
Making puni-style rolags with Corriedale wool is a favourite of many fibre artists. It’s light, lofty, and has a beautiful crimp. It doesn’t create as tight of a roll as some other fibres, like silk, but it’s perfect for spinning into soft, airy yarn.
Step 5: Experimenting with Colours and Techniques
One of the joys of using a blending board is that the possibilities are endless. You can repeat this process until you’ve used up all your fibre, or until you have enough batts for your project.
When it comes to spinning, you can start from the same end each time to create a uniform, repeating gradient. Or, you can switch it up by spinning from the same colour each time. This will give you longer sections of your dominant colours with shorter blends of the in-between colours. The result is a stunning yarn with lots of depth and interest.
Why Use a Blending Board For Fibre Preparation?
Using a blending board is such a satisfying and creative way to prepare your fibres for spinning. Not only do you get to play with colour and texture, but you also end up with batts and rolags that are truly one-of-a-kind. Whether you’re making a gradient batt, experimenting with different colours, or creating puni-style rolags, the Ashford Blending Board is a tool that will keep you inspired and excited about your fibre arts journey.
So next time you’re settling in for an evening of crafting, grab your blending board and have some fun. Who knows what beautiful creations you’ll come up with? And remember, the best part about crafting is the joy it brings—not just in the finished product, but in the process itself.
Happy blending!
-
 Blending Board 108 PPSI$279.00 inc GST
 -
Corriedale Sliver Sample Pack 1 – Lights$110.00 inc GST
-
Handcard Standard 72 PPSI 220 x 125mm$89.50 inc GST
-
Blending Board Brush Lacquered$34.50 inc GST
-
Merino Wool Fibre – 3 Colour Packs$14.95 inc GST
-
7 Colour Corriedale Wool 100gm Bags$14.00 inc GST
-
Angelina Fibre Silver – 10gm Bag$7.50 inc GST
-
Angelina Fibre Gold – 10gm Bag$7.50 inc GST
- A Guide to Creating Gorgeous Gradient Batts on Your Ashford Blending BoardOne of our most popular accessories that we sell, is the Ashford Blending Board. It’s not just versatile and portable, but it’s also a game-changer when it comes to blending fibres into beautiful, gradient batts. Whether you’re watching your…..[KEEP READING]..
- A Spinner’s Guide To Choosing Your Perfect Wool & Fibres For Spinning YarnChoosing Your Fibres and Wool for Spinning Yarn So, you’ve decided to embark on the wonderful world of spinning! With a dizzying array of fibres out there, it can be overwhelming to know where to start. Fear not, fellow…..[KEEP READING]..
- The Magical World of Wool Spinning with Ashford Spinning WheelsDive into the Magical World of Wool Spinning with Ashford Spinning Wheels Have you ever admired the unique texture of handspun yarn or been mesmerised by videos of wool effortlessly transforming into fluffy clouds? If you’ve felt that spark…..[KEEP READING]..
- Ashford Spinning Wheels Reviews and DescriptionsWhat is the best Ashford spinning wheel? At The Good Yarn, as an authorised dealer of Ashford Wheels and Looms, we are always asked our reviews of Ashford Spinning Wheels. We are asked what accessories are included, are they…..[KEEP READING]..
- Ashford Spinning Wheel Maintenance AdviceIf you find yourself looking for Ashford Spinning Wheel Advice, Richard Ashford has put together some great information below. It will keeping your spinning wheels in tip top shape. In this article you will find information on both current and…..[KEEP READING]..